|
|
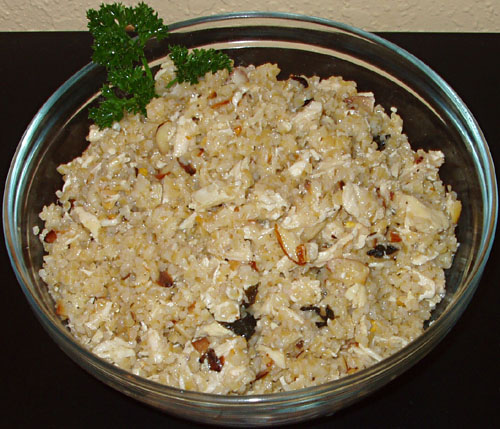 Bulgur Chicken Salad Total time: 20 minutes, plus chicken cooking time
Adapted from Clean Eating Magazine (March/April 2010).
2 boneless, skinless chicken breasts, cooked and shredded or cubed
2 cups chicken broth
1 cup fine-grain bulgur wheat
1/4 cup almond slivers, toasted
1/4 cup mint leaves, chopped (optional)
2 Tbsp olive oil
2 Tbsp lemon juice
2 tsp red pepper flakes
1/2 tsp ground cumin or to taste
salt and pepper to taste
In a small saucepan, bring chicken broth to a boil. Place bulgur in a small-medium bowl. Add chicken broth to bulgur and let set for 5-10 minutes, until most or all of the broth has been absorbed.
In a medium bowl, mix together oil, lemon juice, and seasonings. Add shredded chicken, and mix well to coat. Add almonds and mint, toss to coat. Add bulgur and mix well.
Serve cold or room temperature.
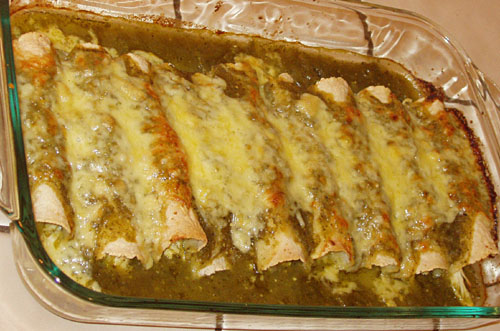 Enchiladas Verde Con Pollo Total time: Plan for 3 hours your first time, 2 hours each time after that.
The 2010 May Daring Cooks challenge was hosted by Barbara of Barbara Bakes and Bunnee of Anna+Food, and they chose a delicious Stacked Green Chile & Grilled Chicken Enchilada recipe in celebration of Cinco de Mayo! The recipe, featuring a homemade enchilada sauce was found on www.finecooking.com and written by Robb Walsh.
6-8 fresh Anaheim chiles (or 4-5 pasillas)
4-6 tomatillos – peeled, with stems removed
4 cups Chicken broth
1 clove Garlic, minced
2 teaspoons yellow onion, minced
1 teaspoon dried oregano
½ tsp Kosher salt (add more to taste)
¼ tsp Black Pepper (add more to taste)
Hot sauce, your favorite (optional)
2 Boneless chicken breasts (you can also use bone-in chicken breasts or thighs)
3 tablespoons Olive oil or other neutral vegetable oil (use more as needed)
Kosher salt and pepper
12 Small Corn tortillas (5-6 inch/13-15 cm). (you can also use wheat tortillas or other wraps)
6 ounces grated Monterey Jack, 170 grams (other cheeses (cheddar, pepper jack, Mexican cheeses) can be used. Just be sure they melt well and complement the filling)
Cilantro for garnish, chopped and sprinkled (optional)
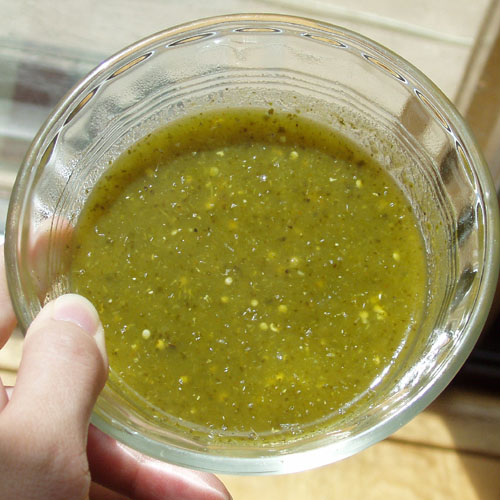 Pureed Peppers and Tomatillos Directions:
Roasting Fresh Chiles
1. Coat each chile with a little vegetable oil. If you are doing only a couple chiles, using the gas stove works. For larger batches (as in this recipe), grilling or broiling is faster.
2. Lay the oiled chiles on the grill or baking sheet (line pan with foil for simpler clean-up). Place the grill or broil close to the element, turning the chiles so they char evenly. They should be black and blistered.
3. As they are completely charred (they will probably not all be done at once), remove them to a bowl and cover with plastic. Let them rest until they are cool, about 10 minutes.
4. Pull on the stem and the seed core MAY pop out. Open the chile and remove the seeds. Turn the chile skin side up and with a paring knife, scrape away the skin. Sometimes it just pulls right off, sometimes you really have to scrape it. (I kept the seeds in the pepper.)
5. DO NOT RINSE!
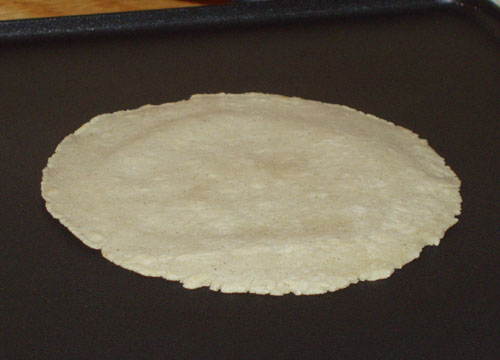 Corn tortillas made with masa Green Chile Sauce
1. Put a medium saucepan of water on to boil. Boil the tomatillos until soft, 5 to 10 minutes. You can also grill the tomatillos until soft. (I prefer to grill mine, along with all peppers, onions, and garlic.)
2. Drain and puree in a blender or food processor, add roasted green chiles, peppers, onions and garlic, and blend some more.
3. Return the tomatillo-chile mixture to the saucepan along with the chicken broth, oregano, salt and pepper.
4. Bring to a boil over medium-high heat and then reduce the heat and simmer for 20 minutes.
5. Adjust seasonings and add hot sauce if you want a little more heat.
Stacked Green Chile and Grilled Chicken Enchiladas
1. Heat a gas grill to medium high or build a medium-hot charcoal. Coat the chicken with olive oil and season well with salt and pepper. Preheat oven to 450 degrees.
2. Grill the chicken until just cooked through, 4-5 minutes a side for boneless chicken breasts.
3. Cool and then slice into thin strips or shred.
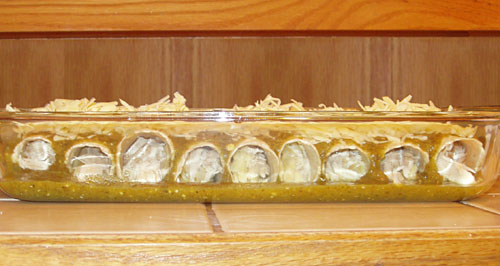 Uncooked Enchiladas Skip steps 4-12 if you’re just rolling your enchiladas.
4. In a small skillet, heat 3 tablespoons oil over medium-high heat until very hot. Dip the edge of a tortilla into the oil to check – it should sizzle immediately.
5. Using tongs, put a tortilla into the pan and cook until soft and lightly brown on each side, about 15-20 seconds per side (at the most).
6. Drain on paper towels.
7. Add oil as needed and continue until all 12 tortillas are done.
8. In a baking dish large enough to hold four separate stacks of tortillas, ladle a thin layer of sauce.
9. Lay four tortillas in the dish and ladle another ½ cup (4 ounces/112 grams) of sauce over the tortillas.
10. Divide half the chicken among the first layer of tortillas, top with another ½ cup of sauce and 1/3 of the grated cheese.
11. Stack another four tortillas, top with the rest of the chicken, more sauce and another third of the cheese.
12. Finish with the third tortilla, topped with the remaining sauce and cheese.
13. Bake until the sauce has thickened and the cheese melted, about 20 minutes. Let rest for 5-10 minutes.
14. To serve, transfer each stack to a plate. Spoon any leftover sauce over the stacks and sprinkle with cilantro, if you wish. The stacks may also be cooked in individual gratin dishes.
My combination of peppers and chicken broth yielded enough sauce for two dishes. I made these with homemade corn tortillas the first night, with shredded chicken, and then with store-bought flour tortillas and shredded pork the second night. I think the corn tortillas had better texture and flavor, but the shredded pork was far tastier than the plain salt&pepper chicken.
I always use extra sharp white cheddar cheese for “your choice shredded cheese”.
I prefer to boil my meats and shred them, rather than grilling or pan frying. I also feel it’s helpful to season them with at *least* salt, pepper, and some sort of chili powder.
I chose to roll my enchiladas instead of stacking them. If you choose to roll your enchiladas, it’s very important to put sauce on the bottom of the pan, under your rolled enchiladas.
I found this recipe and my adjusted process to be really easy and convenient for me, and it tastes better than the recipe I had been using, so it’s definitely a keeper.
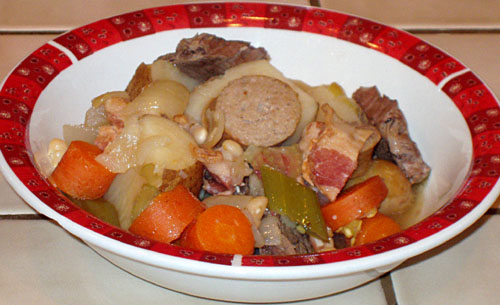 Brunswick Stew Total time: 4-6 hours.
The 2010 April Daring Cooks challenge was hosted by Wolf of Wolf’s Den. She chose to challenge Daring Cooks to make Brunswick Stew. Wolf chose recipes for her challenge from The Lee Bros. Southern Cookbook by Matt Lee and Ted Lee, and from the Callaway, Virginia Ruritan Club.
I’ve halved the recipe and all but butchered the rest of it. My changes are mostly in italics. For the original recipe, please visit the Wolf’s Den.
Adapted from “The Lee Bros. Southern Cookbook: Stories and Recipes for Southerners and Would-Be Southerners” by Matt Lee and Ted Lee
2 lb chicken (I used 2 pounds of t-bone steaks)
1/2 lb rabbit, quartered (I used 1/2 pound of homemade sausage)
4-6 slices bacon, roughly chopped
6 cups chicken broth or stock (I used beef broth)
1 lb potatoes
1 1/2 cups canned or soaked navy beans, drained
1 large onion
1 large tomato
1 large celery stalk
1 carrot
2 serrano peppers
1 1/2 tsps sea salt, and to taste
1 bay leaf
2 Tbsp red wine vinegar
3 Tbsp lemon juice
tabasco sauce to taste
1-In the largest stockpot you have, preferably a 10-12 qt or even a Dutch Oven if you’re lucky enough to have one, fry the bacon over medium-high heat until it just starts to crisp. Transfer to a large bowl, and set aside. Reserve most of the bacon fat in your pan, and with the pan on the burner, add in the chiles. Toast the chiles until they just start to smell good, or make your nose tingle, about a minute. Remove to bowl with the bacon. (I removed the bacon, but I added my onions at this time and sauteed them until golden brown. Then I added my peppers and proceeded to step 2 without removing anything else from the pot.)
2- Season liberally both sides of the rabbit and chicken pieces with sea salt and pepper. Place the rabbit pieces in the pot and sear off all sides possible. You just want to brown them, not cook them completely. Remove to bowl with bacon and chiles, add more bacon fat if needed, or other oil of your choice, then add in chicken pieces, again, browning all sides nicely. Remember not to crowd your pieces, especially if you have a narrow bottomed pot. Put the chicken in the bowl with the bacon, chiles and rabbit. Set it aside. (I did not remove anything from the pot.)
3- Add 2 cups of your chicken broth or stock to the pan and basically deglaze the pan, making sure to get all the goodness cooked onto the bottom. The stock will become a nice rich dark color and start smelling good. Bring it up to a boil and let it boil away until reduced by at least half. (Here’s where I transferred everything to my pre-warmed crockpot and set it to “High”.) Add your remaining stock, the bay leaves, celery, potatoes, chicken, rabbit, bacon, chiles and any liquid that may have gathered at the bottom of the bowl they were resting in. Bring the pot back up to a low boil/high simmer, over medium/high heat. Reduce heat to low and cover, remember to stir every 15 minutes, give or take, to thoroughly meld the flavors. Simmer, on low, for approximately 1 ½ hours. The stock may become a yellow tinge with pieces of chicken or rabbit floating up, the celery will be very limp, as will the chiles. (Instead of playing the waiting game, I just dumped everything into my crockpot, including all the remaining vegetables, closed the lid and let it sit for 4 hours on high. I added the lemon juice, vinegar, and some super yummy chipotle tabasco just before serving.)
(Optional 4- If you used meat with bones, complete this step) With a pair of tongs, remove the chicken and rabbit pieces to a colander over the bowl you used earlier. Be careful, as by this time, the meats will be very tender and may start falling apart. After you’ve allowed the meat to cool enough to handle, carefully remove all the meat from the bones, shredding it as you go. Return the meat to the pot, throwing away the bones.
4- Add in your carrots, and stir gently, allowing it to come back to a slow simmer. Simmer gently, uncovered, for at least 25 minutes, or until the carrots have started to soften.
5- Add in your onion, beans, and tomatoes. As you add the tomatoes, carefully crush them up. Simmer for another 30 minutes, stirring every so often until the stew has reduced slightly, and onions, and beans are tender. Remove from heat and add in vinegar, lemon juice, stir to blend in well. Season to taste with sea salt, pepper, and Tabasco sauce if desired.
6- You can either serve immediately or refrigerate for 24 hours, which makes the flavors meld more and makes the overall stew even better. Serve hot, either on its own, or with a side of corn bread, over steamed white rice, with any braised greens as a side.
For my broth, I did a slight variation of the optional Sunday Chicken Broth recipe provided in the challenge. Instead of using chicken bones, I used beef bones! Sunday Beef Broth!
This was a very different tasting stew from what I’m used to, even with my own personal touches. There seemed to be a very high acid content, which was startlingly good to me (not normally a fan of sour).
The optional recipe from the April 2010 DC Challenge.
From “The Lee Bros. Southern Cookbook: Stories and Recipes for Southerners and Would-Be Southerners” by Matt Lee and Ted Lee
Makes about 1 quart (4 cups or 919.68 grams or 32.303 oz)
Estimated Time- 1 ¼ hours
Bones and trimmings, but not giblets, of one 3 ½- 4 ½ lb (1594.32-2049.84 grams or 56-72 oz) chicken, or 12-14 oz / 341.64-398.58 grams / approx. 2 cups chicken bones and trimmings
1 large onion, trimmed, peeled, quartered
6 large stems fresh flat leaf parsley
1 stalk celery, cut into 2” lengths
2 large bay leaves
5 cups / 1149.6 grams / 40.379 oz cold water
1 cup / 229.92 grams / 8.076oz crisp dry white wine
Salt and pepper to taste
Place bones/trimmings in medium stockpot and add onion, parsley, celery and bay leaves. Add wine and water, liquid should cover all ingredients, if not, add more until it does. Bring to vigorous simmer over high heat, then reduce heat and simmer gently for roughly 45 minutes to an hour, skimming any scum or fat that comes to the surface.
Strain broth into bowl through fine mesh strainer. Discard the solids. Measure what you are left with, if not planning to further reduce, then salt and pepper to taste.
Store in tightly sealed container in refrigerator until the remaining fat congeals on the top. Remove the fat, and unless not using within 2 days, keep tightly sealed in the refrigerator. Otherwise, freeze, and it will keep for upwards of a month.
I used t-bones and fat scraps from my steaks and 1/2 cup sherry instead of a full cup of wine.
 Cheesesteak "hot pocket" sandwiches Total time: 1.5 hours
1/2 pound thinly sliced beef, cooked
1 cup shredded cheese
2 Tbsp cream cheese
1 large jalapeno, minced
half batch of Empanada Dough III or other pastry dough
Preheat oven to 425.
Mix together cheeses and jalapeno until somewhat smooth (about 40 times around the bowl).
Add meat and mix well.
If using the empanada dough or pastry dough, separate out into 8 equal parts. Roll nearly flat. Place a heaping tablespoon of meat mixture into the center. Fold over and press close.
Bake on 425 for 25-30 minutes or until golden brown.
As I was rolling out the dough, I was thinking, “man, this would be a lot faster if I’d just used bread and made sandwiches in my sandwich maker”. Oh well, next time.
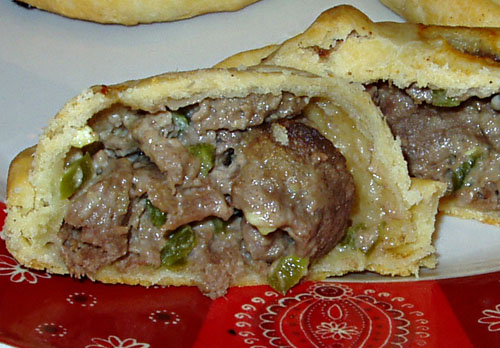 Inside the cheeseteak sandwich... not-so-minced jalapenos!
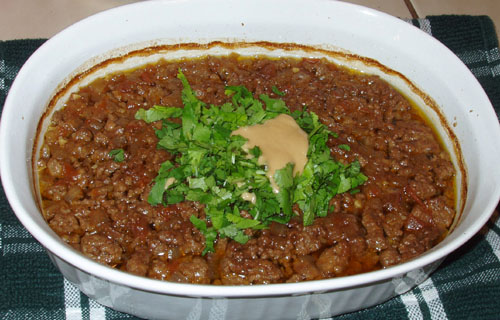 Braised Bolognese Sauce Total time: 1.5 hours.
After doing the pork satay for the January DC Challenge, I thought I’d give this book another go. Adapted from Five-spice Lamb in 1000 Recipes by Martha Day.
1 pound ground beef
1 onion, chopped
1 cup tomatoes, chopped
1 cup beef stock
2 Tbsp hoisin sauce
1 Tbsp soy sauce
1 Tbsp ginger root, minced
1 clove of garlic, minced
1 tsp five-spice powder
salt and pepper to taste
1 cup of chopped vegetables (optional)
1/4 cup to 1/2 cup cilantro, chopped (optional)
1 dollop of tahini paste (optional)
Preheat oven to 325.
Brown beef in a large skillet. Remove with a slotted spoon and set aside. Maintain the grease in the pan to saute onions, garlic and ginger root. Cook on medium-high heat until onions turn translucent or even golden.
Add the meat back to the pan, as well as tomatoes, stock, hoisin, soy sauce, and five-spice. Mix well. Cook for 2-3 minutes. Salt and pepper to taste.
Transfer to a casserole dish and bake, covered, for 60 minutes. If you’re using the optional vegetables, bake for 45 minutes, stir in vegetables, then bake for another 15 minutes.
Stir in cilantro and tahini just before serving.
The original recipe calls for minced lamb and lamb stock, as well as toasted sesame seeds instead of tahini.
I skipped the vegetables and served this (with a full 1/2 cup of cilantro) as a bolognese sauce on top of Elise’s Spanish rice. I think it would have tasted great on top of soba noodles… maybe next time.
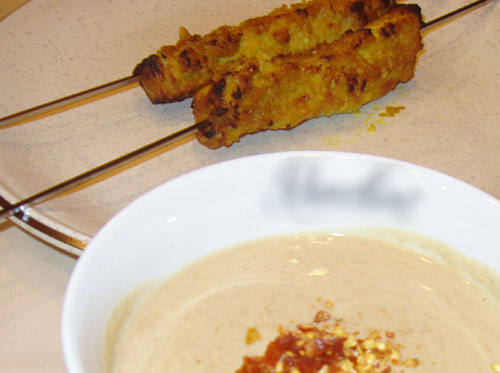 Pork Satay III The January 2010 DC challenge was hosted by me, and I chose a delicious Thai-inspired recipe for Pork Satay with Peanut Sauce from the book 1000 Recipes by Martha Day.
I picked this recipe for the DC challenge because it’s what I was cooking some 8 hours after offering to be the last-minute host, three days before the challenge was to be posted. The focus of this challenge is to marinade.
Total time: 40 minutes, plus marinade time.
1/2 small onion, chopped
2 garlic cloves, crushed
1 Thai dragon (bird’s eye) chili pepper
2 T ginger root, chopped (4 cm cubed)
2 T lemon juice (1 oz or 30 mls)
1 T soy sauce (0.5 oz or 15 mls)
1 T fish sauce (0.5 oz or 15 mls)
1 tsp ground coriander (5 mls)
1 tsp ground cumin (5 mls)
1/2 tsp ground turmeric (2-2.5 mls)
2 T vegetable oil (or peanut or olive oil) (30 mls)
1 pound of pork (loin or shoulder cuts) (16 oz or 450g)
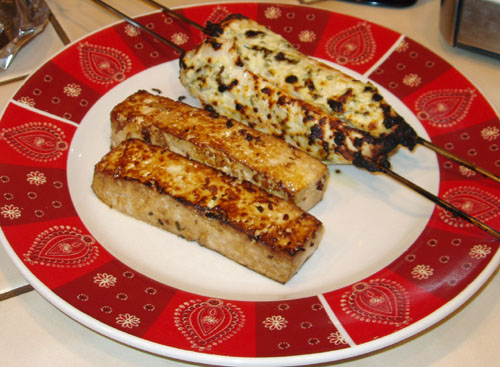 Pan-fried tofu satay and broiled chicken satay Directions:
1. Cheater alert: If you have a food processor or blender, dump in everything except the pork and blend until smooth. Lacking a food processor, I prefer to chop my onions, garlic, ginger and peppers really fine then mix it all together in a medium to large bowl.
2. Cut pork into 1 inch strips.
3. Cover pork with marinade. You can place the pork into a bowl, cover/seal and chill, or place the whole lot of it into a ziplock bag, seal and chill.
4. If using wooden or bamboo skewers, soak your skewers in warm water for at least 20 minutes before preparing skewers.
5. Gently and slowly slide meat strips onto skewers. Discard leftover marinade.*
6. Broil or grill at 290°C/550° F (or pan fry on medium-high) for 8-10 minutes or until the edges just start to char. Flip and cook another 8-10 minutes.
* If you’re grilling or broiling, you could definitely brush once with extra marinade when you flip the skewers.
Shown above with peanut sauce.
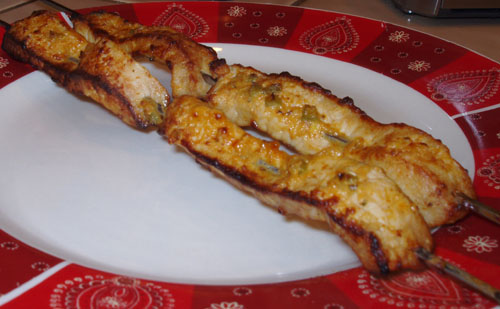 TexMex Pork Satay I also did this challenge using my trusty Pork Satay II marinade on tofu, pan fried (middle picture), chicken satay marinated in raita (shown with tofu), and the experimental but oh-so-wonderful TexMex Pork Satay marinated in a Chevy’s inspired chipotle and jalapeno cream sauce.
I also did all three dipping sauces suggested in the challenge (peanut sauce, Thai pepper dip, tamarind dip, with changes), as well as using the TexMex dip and my favorite raita.
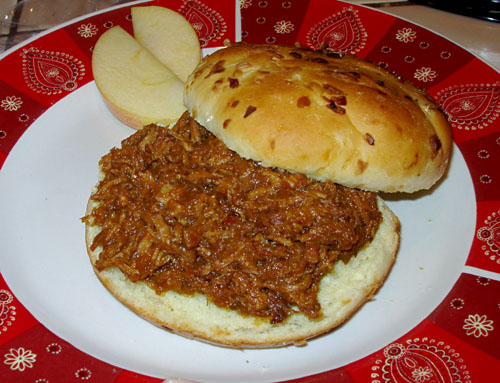 Barbecue Sauce on Pulled Pork Total time: 8 minutes.
1/2 onion, quartered
1 tomato, quartered
2 serrano peppers
1 clove garlic
1/3 c molasses
1/4 c ketchup
1/4 c red wine vinegar
2 T horseradish mustard
1 T Worcestershire sauce
1 T ground chipotle pepper
1 tsp ground cayenne pepper
1/4 tsp black pepper
1/4 tsp salt
Blend the first four ingredients into a fine puree or until smooth. Stir in the other ingredients and mix well. Ready for dipping or cooking.
Shown here after sitting in the crockpot all day for pulled pork sandwiches.
The sweetness and flavor was exactly what I was looking for, but it needed a little more heat. I originally did this with one serrano. If I could “do-over”, I’d add a second one, so I’ve updated the recipe to match my taste.
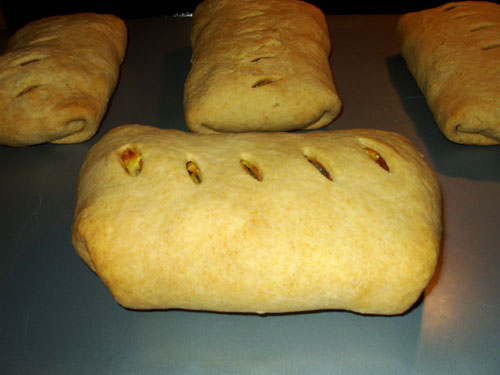 Large and in charge breakfast pastry! The December 2009 Daring Cooks challenge was hosted by Simone of Junglefrog Cooking. Simone chose Salmon en Croûte (or alternative recipes for Beef Wellington or Vegetable en Croûte) from Good Food Online. The key to the challenge was to cook with a pastry, and I opted for a thriftier alternative, breakfast en croûte.
Total time: 2 hours, plus 1-24 hour chill time
1/2 pound regular pork sausage
3 large eggs
1-2 large potatoes, quartered (enough to yield 2 cups)
1 Tbsp milk
16 oz pastry dough, cool or chilled, divided
Boil potato pieces for 10-15 minutes. Set aside to cool.
Separate sausage into 2 uniform rectangular patties. Cook on medium heat until completely browned on all sides (about 10 minutes). Set aside.
In a small bowl, beat eggs with milk. Lightly grease or butter a large (>= 12 inches) frying pan and heat on medium-low. Spread half the egg mixture in the pan (you may need to tilt the pan to cover the entire area). Cook on medium-low for 2-3 minutes. Cover and continue to cook for 2 more minutes. Gently remove from the pan and onto a plate. Set aside. Repeat with the remaining egg mix. These are your egg wraps.
Grate, shred, slice or mash potatoes.
 Breakfast en croûte! On a large, clean surface, lay out a sheet of saran wrap or wax paper. Place one cooked egg wrap in the center of the sheet. Spread half of the shredded potatoes evenly across the egg wrap. Press lightly into place.
Place one of your cooked sausage patties on top of the potatoes, as close to the center as possible. Wrap the eggs and potatoes around the sausage patty. Use the saran wrap to press and hold it firmly in place. Chill for one hour (or overnight!).
Preheat oven to 400 F.
Divide pastry dough. Roll the pastry out so you can wrap an egg-wrap in it completely (approx. 2-3 mm thick) and lay it on a buttered or oiled baking sheet (it may hang over the edges). Put an egg-wrap in the middle. If it has a thinner tail end, tuck it under. Now fold the pastry over into a neat parcel (the join will be at the top, so trim the edge neatly), making sure you don’t have any thick lumps of pastry as these won’t cook through properly. Trim off any excess as you need to. Make 3 neat cuts in the pastry to allow steam to escape and make some decorations with the off-cuts to disguise the join if you like. Repeat for the second egg-wrap.
Bake for 30-60 minutes or until the crust turns brown.
The more pastries you put on the cookie sheet, the longer it takes.
Whatever you do, don’t skip the chill phase; it’s really important to chill your filling completely before wrapping it in pastry.
To make a more glamorous pastry, you could brush the top of the pastry with beaten egg before baking.
I originally doubled this recipe and made 3 of these bad boys, but they were huge, and it took forever to bake. The second time I made 4 using a doubled recipe, and it was still a lot of food (and they were still quite large). I think I’ll use this halved recipe next time and only make two for the three of us.
I also did a silly little enchilada en croûte with chicken, black beans, and spicy red sauce.
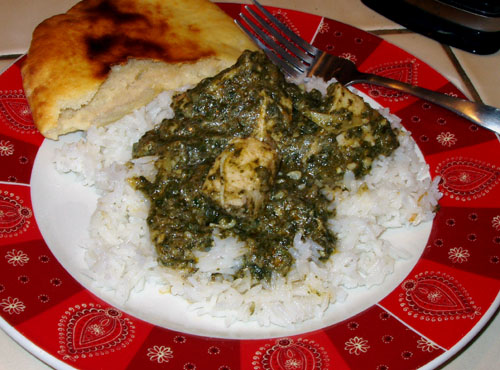 Chicken Saag with rice and naan Total time: Approximately 1 hour and 20 minutes.
Adapted from 1,000 Indian Recipes by Neelam Batra.
2-4 chicken breasts, quartered
2 small bunches fresh spinach, coarsely chopped
1 large onion, coarsely chopped
4 quarter-sized peeled fresh ginger root + one 1-inch piece peeled fresh ginger root, julienned
3 large cloves fresh garlic, peeled + 1 clove minced
1/4 c water
1/4 c plain yogurt, whisked until smooth
2 Tbsp vegetable oil
1 Tbsp melted ghee (or butter)
2 Tbsp butter, at room temperature
1 large cinnamon stick (about 3 inches)
5 green cardamom pods, crushed lightly to break the skin
1-4 whole dried red chile peppers, such as chile de arbol (optional)
1 Tbsp ground coriander
1 tsp garam masala
1 tsp dried fenugreek leaves
1/2 tsp ground paprika
1/2 tsp salt, or to taste
On medium heat, cook chicken pieces until they turn white on all sides (or lightly browned) and the juices run clear (about 5 minutes, depending on how big your chicken chunks are). Set aside.
In a large pan, bring spinach, onion, ginger slices, whole garlic and water to a boil. Reduce heat to medium-low and simmer, covered, until the spinach is wilted (about 10 minutes). Remove from heat and let cool 5-10 minutes. Pulse lightly in a food processor until just minced (don’t make a puree!!). Return the spinach mix to the pan.
In a small pan, heat the oil and ghee on medium-high. Add the cinnamon, cardamom, and julienned ginger, stirring until the ginger sticks turn golden brown (about 3 minutes). Add the minced ginger, coriander, garam masala, fenugreek, and salt and quickly stir. Slowly add the yogurt (one dollop at a time), stirring constantly to blend it in with the spices.
Immediately after adding all the yogurt, add the entire yogurt spice mix to the spinach mix. Add chicken pieces to spinach mix, cover and simmer on medium-low for 25-30 minutes.
In a small pan, heat the remaining butter and cook the dried chiles for about a minute. Remove from heat, stir in the paprika, then lightly swirl into the spinach mix just before serving. (If you’re doing without chiles, just sprinkle the top of the dish with some paprika before serving.)
Shown here with homemade naan and plain white rice.
You might want to pick out the cinnamon stick and cardamom pods before you serve this dish so someone doesn’t try to eat them; that’d be rather unpleasant.
I crushed my red peppers before putting them in the frying pan.
This recipe dirties up a lot of dishes. You could cut back on them by reusing your chicken frying pan to fry your spices, and you could probably skip the butter-frying of your peppers at the end, too. Just omit the butter entirely and add the peppers and paprika straight to the dish.
|
|


