|
|
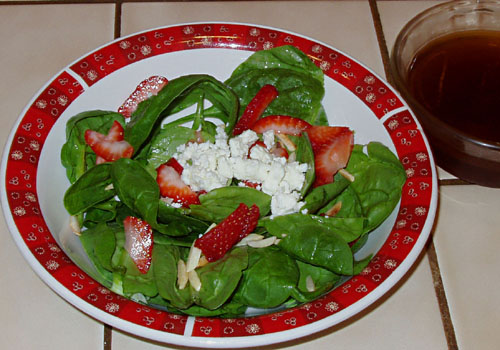 Spinach and Strawberry Salad Total time: 8 minutes.
1/2 pound fresh baby spinach
1/2 cup toasted almond slivers
1/2 cup thinly sliced strawberries
1/2 cup crumbled feta cheese
1 green onion, finely chopped
dressing *
1/2 cup distilled white vinegar
1/2 cup extra virgin olive oil
1/4 cup to 1/2 cup white sugar
1/4 tsp paprika
1/4 tsp Worcestershire sauce
Alternatively, I hear this is really good with pre-made raspberry vinaigrette.
Serves 4.
What a crisp, summer, fresh, wonderful salad!
I mixed up the salad and then drizzled the dressing on top. I put a full 1/2 cup sugar in the dressing, but it was just way too sweet for me. Next time, I’ll chop it in half and add to taste.
I’m glad I didn’t mix the dressing in with the salad… It makes 4 bowls of salad, but the dressing makes enough for 8-12 bowls, depending on how liberal you are with dressing. I’ll definitely adjust that for next time, too.
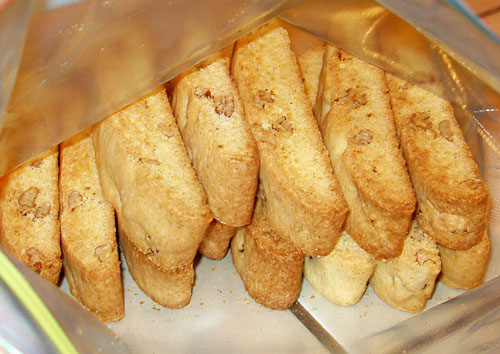 Pecan Biscotti Total time: 1 hour, plus “frosting” time
3 cups cheap all-purpose flour (or 2 1/2 cups of King Arthur flour)
1 cup sugar
1 cup raw pecans, chopped
2 eggs
1/2 cup butter, softened
1 Tbsp hazelnut syrup
1 tsp baking powder
1 tsp vanilla extract
1 tsp salt*
optional spread
1 cup butterscotch chips
1 Tbsp butter
3 Tbsp brown sugar
* Only use 1/2 tsp salt if you’re skipping the butterscotch spread.
Preheat oven to 350.
Mix flour, baking powder and salt in a small mixing bowl, set aside.
Beat sugar and softened butter until smooth. Add eggs, syrup and vanilla, beat until smooth. Add flour mixture to egg mixture and mix just until just blended. Fold in pecans.
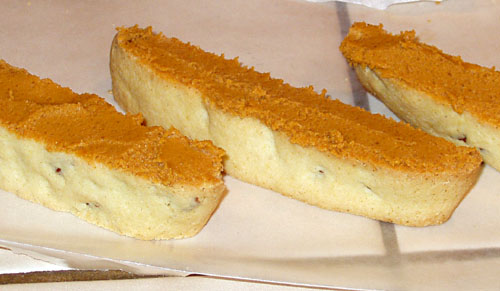 Pecan Biscotti with Butterscotch Divide dough into two pieces. Form into long flat loaves about 1/2 inch tall and 12-15 inches long. Place the loaves 3-4 inches apart on a prepared or non-stick baking sheet.
Bake for 30 minutes or until golden brown. Let cool for 10-15 minutes (or until you can handle the loaves without burning yourself) on a cooling rack or cutting board.
With a serrated or extremely sharp kitchen knife, cut diagonally into 1/2 inch thick slices. Lay the slices flat on the baking sheet.
Bake for 15-18 minutes, turning over once. Transfer to a wire rack to cool.
Melt butterscotch chips, brown sugar and butter on low in a double boiler on the stove or on low heat in the microwave, stirring frequently. Spread warm butterscotch mix across the side or bottom of biscotti. Transfer to wax paper to cool.
Makes about 2 dozen.
The butterscotch chips were apparently more packed with sugar than I anticipated. This makes for an incredibly sweet and somewhat “thick” spread instead of what I’m used to with chocolate. Next time, I’ll not be using any brown sugar. It still cooled and became solid, but I’d much prefer to dip or drizzle it over the top of the biscotti instead of having to spread it on like peanut butter.
The biscotti tastes pretty darn good without the butterscotch.
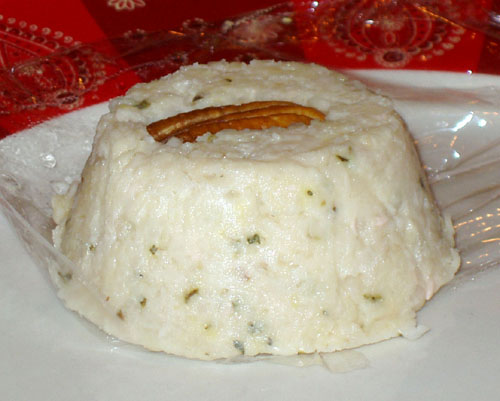 White Bean Layer Total time: 1 hour, plus overnight chilling.
The June 2010 Daring Cook’s Challenge was hosted by Evelyne, of Cheap Ethnic Eatz, and Valerie, of The Chocolate Bunny, and they chose delicious pâté with freshly baked bread.
I served my vegetable pâtés as individual pâté instead of a layered block. I’ve included the red pepper recipe I skipped, as well as my version of the other two layers.
Yields one 25 by 12,5 cm (10 by 5 inch) terrine or loaf pan
Line your pan with plastic wrap, overlapping sides.
White Bean Layer
16 ounces cannellini (white kidney beans), rinsed, drained thoroughly
1 tbsp fresh lemon juice
1 tbsp olive oil
1 tbsp minced fresh oregano or 1 teaspoon dried
2 garlic cloves, pressed
salt and pepper to taste
Boil beans in large saucepan for 30-60 minutes, until soft. Drain thoroughly. Mash beans in large bowl. Add lemon juice, olive oil, oregano and garlic and blend until smooth. Season to taste with salt and pepper. Spread bean mixture evenly on bottom of prepared pan.
Red Pepper Layer
7-ounce / 210 ml jar roasted red bell peppers, drained, chopped
3/4 cup / 180 ml crumbled feta cheese (about 4 ounces)
Combine peppers and feta in processor and blend until smooth. Spread pepper mixture evenly over bean layer in prepared dish.
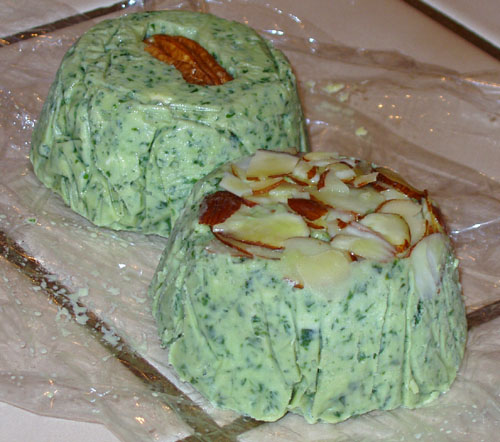 Pesto Layer Pesto Layer
2 garlic cloves
1 cup fresh basil leaves
1 cup fresh Italian parsley leaves
1/4 cup toasted pine nuts
3 tbsp olive oil
1/2 cup ricotta cheese, partially drained
Mince garlic in processor. Add basil, parsley and pine nuts and mince. With machine running, gradually add oil through feed tube and process until smooth. Mix in ricotta. Spread pesto evenly over red pepper layer.
Cover with plastic wrap and refrigerate overnight.
To unmold, invert pâté onto serving platter. Peel off plastic wrap from pâté. Garnish with herb sprigs and serve with sourdough bread slices.
I lined my cupcake tin with saran wrap, placed pecans and almond slivers in the bottom of some cups, then filled them with bean, pea or pesto mash. After chilling in the refrigerator overnight, I gently flipped them out onto my cutting board to make cute little mini pâtés.
I kept them in the freezer until an hour before I was going to use them. Over the course of few weeks, I tried each of these with pita bread, whole wheat bread toast, and a variety of crackers. The bean layer tasted best with some cream cheese on a pita, and the pesto layer tasted great on everything (I love basil and pine nuts).
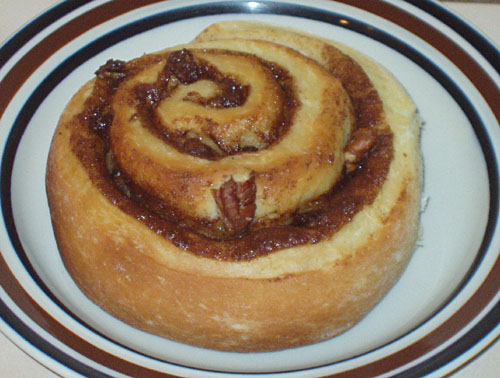 Cinnamon Rolls Warning: Cinnamon rolls take time – lots of time. The following recipe is 4-5 hours or overnight. This recipe is supposed to make 12, but I always end up with 16-20 rolls.
5 cups cheap all purpose flour (or 4.5 cups of King Arthur AP flour)
1/2 cup chopped pecans (optional)
1/2 cup seedless raisins (optional)
3 eggs, beaten
7 T shortening
7 T white granulated sugar, plus 2 tsp sugar
1/4 cup packed brown sugar
2 T warm water (105-115F)
1 T ground cinnamon
1 T active dry yeast
1 tsp salt
4 T – 8 T melted butter, or as much or less as you want
Scald 1 cup of milk (I like to put it in the microwave on high for 30 seconds, stir, on high for a minute, stir, then on high again for 30 seconds). Add shortening, stir well. Set aside to cool to room temperature (about 30 minutes).
In a small bowl, combine yeast, water, and 2 tsp sugar. Let sit for 3-5 minutes or until frothy.
In a large mixing bowl, combine white sugar, eggs, and salt. Add cooled milk mixture, mix well. Add yeast mixture, mix well. Add flour, mix well for 3-5 minutes, until all the flour is completely incorporated.
Transfer to a lightly greased bowl, cover, and let rise until doubled (3-4 hours).
Lightly flour the surface of the dough and your hands. Turn dough out onto a lightly floured board. You might want to lightly flour your rolling pin, as well. Roll dough to a thickness of 1/4 inch, rectangle optional.
In a small bowl, mix brown sugar and cinnamon until the color becomes a uniform brown.
Spread the surface of the rolled dough generously with melted butter. Sprinkle cinnamon mixture as evenly as possible across the surface. Follow suit with pecans and/or raisins.
Starting at one side of your dough, fold dough in tightly and roll as snugly as you can to the opposite side. Cut into 1 inch slices and place directly into lightly greased baking tin. Place rolls 1/4 inch to 1 inch apart. Cover and let rise 30 minutes, or cover and store in the refrigerator up to 48 hours. (Remove from refrigerator and let rise 30 minutes before baking.)
Bake 15-30 minutes in a 375F oven, until tops are golden brown (eggwash optional). Just keep an eye on them after the 15 minute mark. I use the middle rack.
When I bake 4 in my 8 inch brownie pan, I only bake them for 15 minutes. Same thing if I squeeze them into a circle on my cookie sheet. When I put 8 in my lasagna pan, I have to bake them quite a bit longer, hence the “15-30” minute range on baking times.
Check out Joy the Baker’s photos here for step by step instructions on how to roll, sprinkle, and prepare cinnamon rolls (not to mention a much sweeter recipe).
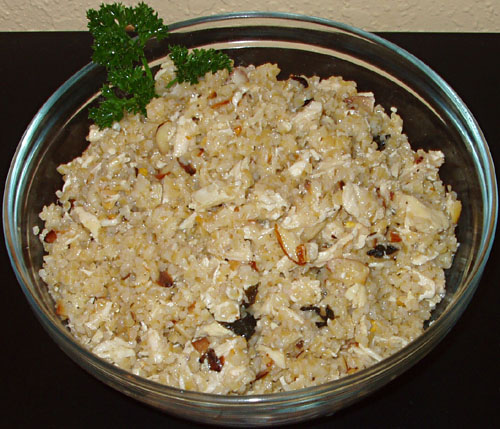 Bulgur Chicken Salad Total time: 20 minutes, plus chicken cooking time
Adapted from Clean Eating Magazine (March/April 2010).
2 boneless, skinless chicken breasts, cooked and shredded or cubed
2 cups chicken broth
1 cup fine-grain bulgur wheat
1/4 cup almond slivers, toasted
1/4 cup mint leaves, chopped (optional)
2 Tbsp olive oil
2 Tbsp lemon juice
2 tsp red pepper flakes
1/2 tsp ground cumin or to taste
salt and pepper to taste
In a small saucepan, bring chicken broth to a boil. Place bulgur in a small-medium bowl. Add chicken broth to bulgur and let set for 5-10 minutes, until most or all of the broth has been absorbed.
In a medium bowl, mix together oil, lemon juice, and seasonings. Add shredded chicken, and mix well to coat. Add almonds and mint, toss to coat. Add bulgur and mix well.
Serve cold or room temperature.
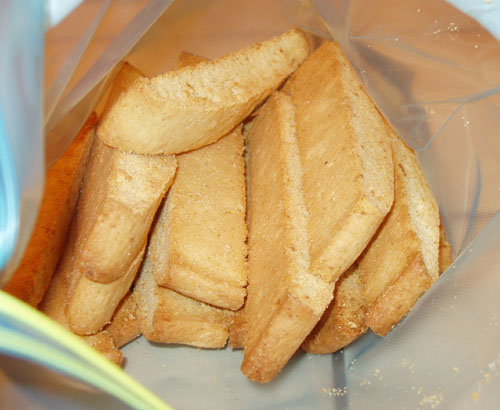 Ginger Lemon Biscotti Total time: 1 hour
3 cups cheap all-purpose flour (or 2 1/2 cups of King Arthur flour)
1 cup sugar
1/2 cup butter, softened
1/4 cup – 1/2 cup minced ginger root
2 eggs
1 tsp vanilla
1 tsp baking powder
1 tsp lemon zest
1/2 tsp salt
Preheat oven to 350.
Mix flour, baking powder and salt in a small mixing bowl, set aside.
Beat sugar and softened butter until smooth. Add eggs, zest and vanilla, beat until smooth. Add flour mixture to egg mixture and mix just until just blended. Fold in ginger.
Divide dough into two pieces. Form into long flat loaves about 1/2 inch tall and 12-15 inches long. Place the loaves 3-4 inches apart on a prepared or non-stick baking sheet.
Bake for 30 minutes or until golden brown. Let cool for 10-15 minutes (or until you can handle the loaves without burning yourself) on a cooling rack or cutting board.
With a serrated or extremely sharp kitchen knife, cut diagonally into 1/2 inch thick slices. Lay the slices flat on the baking sheet.
Bake for 15-18 minutes, turning over once. Transfer to a wire rack to cool.
Makes about 2 dozen.
I’ve used both lemon zest and orange zest to great, tasty success.
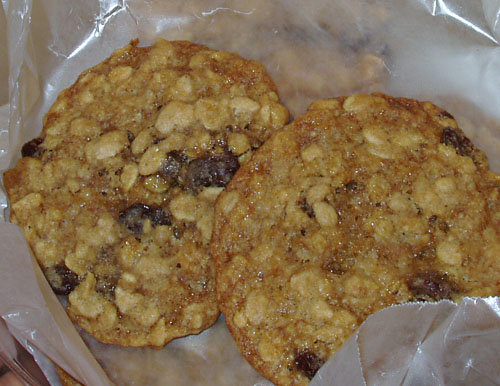 Oatmeal Raisin Cookies Total time: 1.5 hours
1/2 c raisins, soaked for 30-60 minutes, then drained
1/2 cup butter, softened (1 stick)
3/4 c brown sugar
1/4 c white sugar
1 c cheap ap flour
1 egg
1.5 c rolled oats
1/2 tsp salt
1/2 tsp baking soda
1/4 tsp nutmeg
1/2 tsp cinnamon
1 1/2 tsps vanilla
Preheat the oven to 360.
Cream together sugar and butter until light and fluffy. Add egg, salt, nutmeg, cinnamon, vanilla, mix well.
Add flour and baking soda, mix lightly until just incorporated. Add oats and mix lightly to incorporate. Fold in raisins gently.
Spoon out dough by large tablespoonfuls onto prepared cookie sheets, leaving at least 2 inches between each cookie.
Bake until cookie edges turn golden brown, about 10-12 minutes. Cool completely on cookie sheets before moving to cooling rack (about 5 minutes).
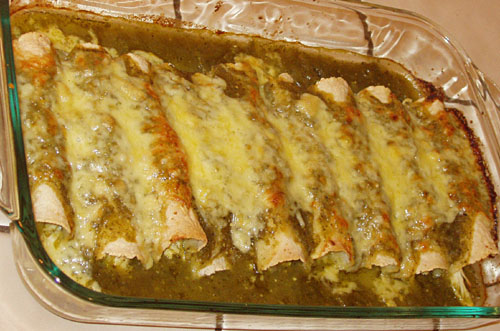 Enchiladas Verde Con Pollo Total time: Plan for 3 hours your first time, 2 hours each time after that.
The 2010 May Daring Cooks challenge was hosted by Barbara of Barbara Bakes and Bunnee of Anna+Food, and they chose a delicious Stacked Green Chile & Grilled Chicken Enchilada recipe in celebration of Cinco de Mayo! The recipe, featuring a homemade enchilada sauce was found on www.finecooking.com and written by Robb Walsh.
6-8 fresh Anaheim chiles (or 4-5 pasillas)
4-6 tomatillos – peeled, with stems removed
4 cups Chicken broth
1 clove Garlic, minced
2 teaspoons yellow onion, minced
1 teaspoon dried oregano
½ tsp Kosher salt (add more to taste)
¼ tsp Black Pepper (add more to taste)
Hot sauce, your favorite (optional)
2 Boneless chicken breasts (you can also use bone-in chicken breasts or thighs)
3 tablespoons Olive oil or other neutral vegetable oil (use more as needed)
Kosher salt and pepper
12 Small Corn tortillas (5-6 inch/13-15 cm). (you can also use wheat tortillas or other wraps)
6 ounces grated Monterey Jack, 170 grams (other cheeses (cheddar, pepper jack, Mexican cheeses) can be used. Just be sure they melt well and complement the filling)
Cilantro for garnish, chopped and sprinkled (optional)
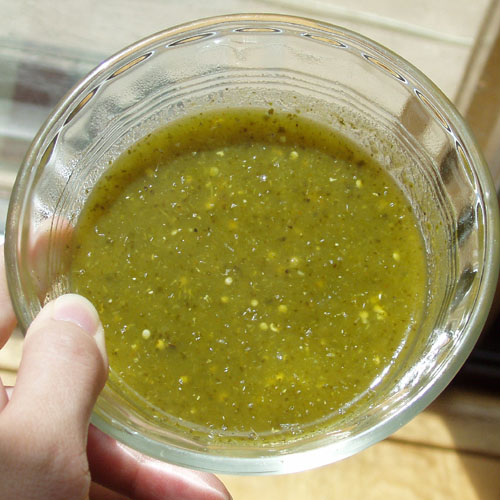 Pureed Peppers and Tomatillos Directions:
Roasting Fresh Chiles
1. Coat each chile with a little vegetable oil. If you are doing only a couple chiles, using the gas stove works. For larger batches (as in this recipe), grilling or broiling is faster.
2. Lay the oiled chiles on the grill or baking sheet (line pan with foil for simpler clean-up). Place the grill or broil close to the element, turning the chiles so they char evenly. They should be black and blistered.
3. As they are completely charred (they will probably not all be done at once), remove them to a bowl and cover with plastic. Let them rest until they are cool, about 10 minutes.
4. Pull on the stem and the seed core MAY pop out. Open the chile and remove the seeds. Turn the chile skin side up and with a paring knife, scrape away the skin. Sometimes it just pulls right off, sometimes you really have to scrape it. (I kept the seeds in the pepper.)
5. DO NOT RINSE!
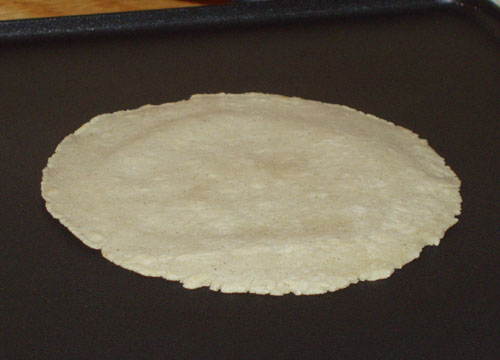 Corn tortillas made with masa Green Chile Sauce
1. Put a medium saucepan of water on to boil. Boil the tomatillos until soft, 5 to 10 minutes. You can also grill the tomatillos until soft. (I prefer to grill mine, along with all peppers, onions, and garlic.)
2. Drain and puree in a blender or food processor, add roasted green chiles, peppers, onions and garlic, and blend some more.
3. Return the tomatillo-chile mixture to the saucepan along with the chicken broth, oregano, salt and pepper.
4. Bring to a boil over medium-high heat and then reduce the heat and simmer for 20 minutes.
5. Adjust seasonings and add hot sauce if you want a little more heat.
Stacked Green Chile and Grilled Chicken Enchiladas
1. Heat a gas grill to medium high or build a medium-hot charcoal. Coat the chicken with olive oil and season well with salt and pepper. Preheat oven to 450 degrees.
2. Grill the chicken until just cooked through, 4-5 minutes a side for boneless chicken breasts.
3. Cool and then slice into thin strips or shred.
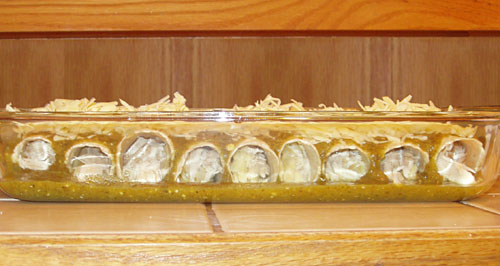 Uncooked Enchiladas Skip steps 4-12 if you’re just rolling your enchiladas.
4. In a small skillet, heat 3 tablespoons oil over medium-high heat until very hot. Dip the edge of a tortilla into the oil to check – it should sizzle immediately.
5. Using tongs, put a tortilla into the pan and cook until soft and lightly brown on each side, about 15-20 seconds per side (at the most).
6. Drain on paper towels.
7. Add oil as needed and continue until all 12 tortillas are done.
8. In a baking dish large enough to hold four separate stacks of tortillas, ladle a thin layer of sauce.
9. Lay four tortillas in the dish and ladle another ½ cup (4 ounces/112 grams) of sauce over the tortillas.
10. Divide half the chicken among the first layer of tortillas, top with another ½ cup of sauce and 1/3 of the grated cheese.
11. Stack another four tortillas, top with the rest of the chicken, more sauce and another third of the cheese.
12. Finish with the third tortilla, topped with the remaining sauce and cheese.
13. Bake until the sauce has thickened and the cheese melted, about 20 minutes. Let rest for 5-10 minutes.
14. To serve, transfer each stack to a plate. Spoon any leftover sauce over the stacks and sprinkle with cilantro, if you wish. The stacks may also be cooked in individual gratin dishes.
My combination of peppers and chicken broth yielded enough sauce for two dishes. I made these with homemade corn tortillas the first night, with shredded chicken, and then with store-bought flour tortillas and shredded pork the second night. I think the corn tortillas had better texture and flavor, but the shredded pork was far tastier than the plain salt&pepper chicken.
I always use extra sharp white cheddar cheese for “your choice shredded cheese”.
I prefer to boil my meats and shred them, rather than grilling or pan frying. I also feel it’s helpful to season them with at *least* salt, pepper, and some sort of chili powder.
I chose to roll my enchiladas instead of stacking them. If you choose to roll your enchiladas, it’s very important to put sauce on the bottom of the pan, under your rolled enchiladas.
I found this recipe and my adjusted process to be really easy and convenient for me, and it tastes better than the recipe I had been using, so it’s definitely a keeper.
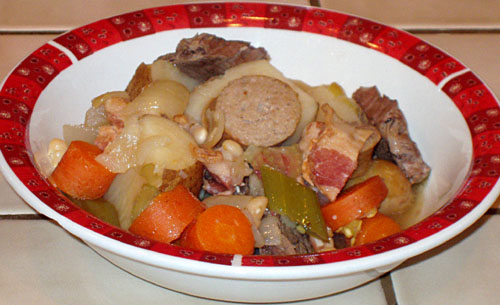 Brunswick Stew Total time: 4-6 hours.
The 2010 April Daring Cooks challenge was hosted by Wolf of Wolf’s Den. She chose to challenge Daring Cooks to make Brunswick Stew. Wolf chose recipes for her challenge from The Lee Bros. Southern Cookbook by Matt Lee and Ted Lee, and from the Callaway, Virginia Ruritan Club.
I’ve halved the recipe and all but butchered the rest of it. My changes are mostly in italics. For the original recipe, please visit the Wolf’s Den.
Adapted from “The Lee Bros. Southern Cookbook: Stories and Recipes for Southerners and Would-Be Southerners” by Matt Lee and Ted Lee
2 lb chicken (I used 2 pounds of t-bone steaks)
1/2 lb rabbit, quartered (I used 1/2 pound of homemade sausage)
4-6 slices bacon, roughly chopped
6 cups chicken broth or stock (I used beef broth)
1 lb potatoes
1 1/2 cups canned or soaked navy beans, drained
1 large onion
1 large tomato
1 large celery stalk
1 carrot
2 serrano peppers
1 1/2 tsps sea salt, and to taste
1 bay leaf
2 Tbsp red wine vinegar
3 Tbsp lemon juice
tabasco sauce to taste
1-In the largest stockpot you have, preferably a 10-12 qt or even a Dutch Oven if you’re lucky enough to have one, fry the bacon over medium-high heat until it just starts to crisp. Transfer to a large bowl, and set aside. Reserve most of the bacon fat in your pan, and with the pan on the burner, add in the chiles. Toast the chiles until they just start to smell good, or make your nose tingle, about a minute. Remove to bowl with the bacon. (I removed the bacon, but I added my onions at this time and sauteed them until golden brown. Then I added my peppers and proceeded to step 2 without removing anything else from the pot.)
2- Season liberally both sides of the rabbit and chicken pieces with sea salt and pepper. Place the rabbit pieces in the pot and sear off all sides possible. You just want to brown them, not cook them completely. Remove to bowl with bacon and chiles, add more bacon fat if needed, or other oil of your choice, then add in chicken pieces, again, browning all sides nicely. Remember not to crowd your pieces, especially if you have a narrow bottomed pot. Put the chicken in the bowl with the bacon, chiles and rabbit. Set it aside. (I did not remove anything from the pot.)
3- Add 2 cups of your chicken broth or stock to the pan and basically deglaze the pan, making sure to get all the goodness cooked onto the bottom. The stock will become a nice rich dark color and start smelling good. Bring it up to a boil and let it boil away until reduced by at least half. (Here’s where I transferred everything to my pre-warmed crockpot and set it to “High”.) Add your remaining stock, the bay leaves, celery, potatoes, chicken, rabbit, bacon, chiles and any liquid that may have gathered at the bottom of the bowl they were resting in. Bring the pot back up to a low boil/high simmer, over medium/high heat. Reduce heat to low and cover, remember to stir every 15 minutes, give or take, to thoroughly meld the flavors. Simmer, on low, for approximately 1 ½ hours. The stock may become a yellow tinge with pieces of chicken or rabbit floating up, the celery will be very limp, as will the chiles. (Instead of playing the waiting game, I just dumped everything into my crockpot, including all the remaining vegetables, closed the lid and let it sit for 4 hours on high. I added the lemon juice, vinegar, and some super yummy chipotle tabasco just before serving.)
(Optional 4- If you used meat with bones, complete this step) With a pair of tongs, remove the chicken and rabbit pieces to a colander over the bowl you used earlier. Be careful, as by this time, the meats will be very tender and may start falling apart. After you’ve allowed the meat to cool enough to handle, carefully remove all the meat from the bones, shredding it as you go. Return the meat to the pot, throwing away the bones.
4- Add in your carrots, and stir gently, allowing it to come back to a slow simmer. Simmer gently, uncovered, for at least 25 minutes, or until the carrots have started to soften.
5- Add in your onion, beans, and tomatoes. As you add the tomatoes, carefully crush them up. Simmer for another 30 minutes, stirring every so often until the stew has reduced slightly, and onions, and beans are tender. Remove from heat and add in vinegar, lemon juice, stir to blend in well. Season to taste with sea salt, pepper, and Tabasco sauce if desired.
6- You can either serve immediately or refrigerate for 24 hours, which makes the flavors meld more and makes the overall stew even better. Serve hot, either on its own, or with a side of corn bread, over steamed white rice, with any braised greens as a side.
For my broth, I did a slight variation of the optional Sunday Chicken Broth recipe provided in the challenge. Instead of using chicken bones, I used beef bones! Sunday Beef Broth!
This was a very different tasting stew from what I’m used to, even with my own personal touches. There seemed to be a very high acid content, which was startlingly good to me (not normally a fan of sour).
The optional recipe from the April 2010 DC Challenge.
From “The Lee Bros. Southern Cookbook: Stories and Recipes for Southerners and Would-Be Southerners” by Matt Lee and Ted Lee
Makes about 1 quart (4 cups or 919.68 grams or 32.303 oz)
Estimated Time- 1 ¼ hours
Bones and trimmings, but not giblets, of one 3 ½- 4 ½ lb (1594.32-2049.84 grams or 56-72 oz) chicken, or 12-14 oz / 341.64-398.58 grams / approx. 2 cups chicken bones and trimmings
1 large onion, trimmed, peeled, quartered
6 large stems fresh flat leaf parsley
1 stalk celery, cut into 2” lengths
2 large bay leaves
5 cups / 1149.6 grams / 40.379 oz cold water
1 cup / 229.92 grams / 8.076oz crisp dry white wine
Salt and pepper to taste
Place bones/trimmings in medium stockpot and add onion, parsley, celery and bay leaves. Add wine and water, liquid should cover all ingredients, if not, add more until it does. Bring to vigorous simmer over high heat, then reduce heat and simmer gently for roughly 45 minutes to an hour, skimming any scum or fat that comes to the surface.
Strain broth into bowl through fine mesh strainer. Discard the solids. Measure what you are left with, if not planning to further reduce, then salt and pepper to taste.
Store in tightly sealed container in refrigerator until the remaining fat congeals on the top. Remove the fat, and unless not using within 2 days, keep tightly sealed in the refrigerator. Otherwise, freeze, and it will keep for upwards of a month.
I used t-bones and fat scraps from my steaks and 1/2 cup sherry instead of a full cup of wine.
|
|



 Leave a comment