|
|
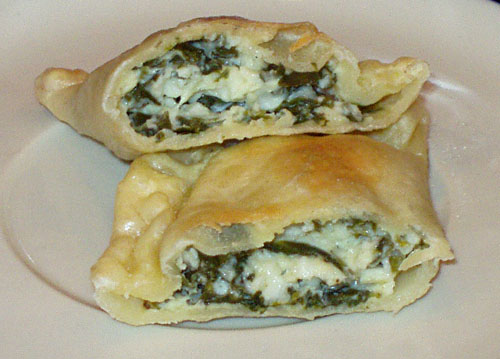 Spaniko-pierogi Total time: Approximately 1.5 hours.
The August 2010 Daring Cooks’ Challenge was hosted by LizG of Bits n’ Bites and Anula of Anula’s Kitchen. They chose to challenge Daring Cooks to make pierogi from scratch and an optional challenge to provide one filling that best represents their locale. Potatoes are local to me (my state ranks “first in per-acre yield of potatoes, far above other potato-producing states and countries, and 57 percent more potatoes per acre” than Idaho), but I thought I’d go with spinach (which my region has 2000-3000 acres dedicated to seed growth alone).
Dough Ingredients
2 to 2 1/2 cups all-purpose flour
1 large egg
1 teaspoon salt
1/2 to 1 cup lukewarm water
Filling Ingredients
1 bunch of spinach, cleaned, rinsed, separated and drained
1/2 c feta cheese
1/2 onion, diced & sauteed in butter until golden brown
1 egg
1/4 tsp salt (optional)
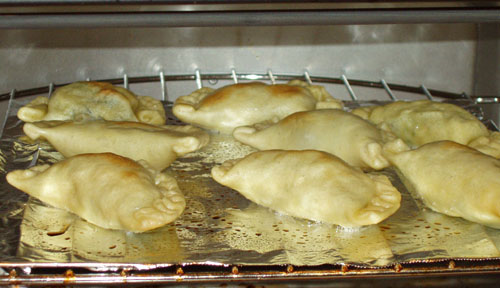 Spaniko-pierogi in the toaster oven Chop spinach leaves into “salad size” pieces. Place in a large, microwave safe bowl and microwave on high for 1 minute. The spinach should wilt to about 1/4 of the original size. You may want to drain in a colander. Let cool 3-5 minutes. Scoop your wilted spinach up in one clump if you can and cut it into bite sized squares. Transfer to a towel (or a pair of paper towels), and attempt to squeeze the remaining water out or let it drain in the towel for 5-10 minutes.
Mix together with remaining filling ingredients and chill completely before use.
Place 2 cups flour in a large bowl and make a well in the center. Break the egg into it, add the salt and a little water at a time (in my situation 1/2 cup was enough). Bring the dough together, kneading well and adding more flour or water as necessary. Cover the dough and let it rest 20 minutes.
On a floured work surface, roll the dough out thinly (1/8” or as thin as you can go) cut with a 4-inch round or glass. Spoon a portion (tablespoon will be the best) of the filling into the middle of each circle. Fold dough in half and pinch edges together. Gather scraps, re-roll and fill. Repeat with remaining dough.
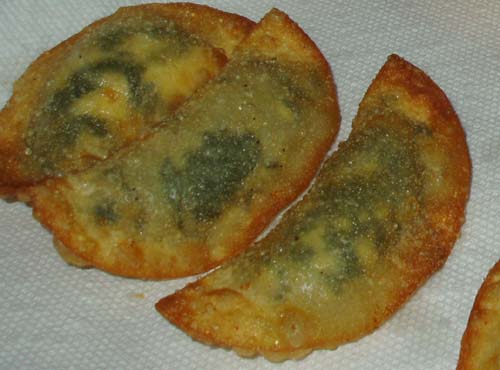 Deep Fried Spaniko-pierogi Bring a large, low saucepan of salted water to boil. Drop in the pierogi, in a single layer in the pan. Return to the boil and reduce heat to medium. When the pierogi rise to the surface, continue to simmer a few minutes more (usually about 5 minutes), until they’ve started to puff out.
Toast in a toaster oven at 375F for 10 minutes or until puffy and light brown.
I find phyllo dough to be expensive if purchased and a real pain to make from scratch. This works for me, and it’s awesome.
There’s a difference in using fresh spinach versus frozen spinach, and that difference is mostly moisture and texture. If you’re not sure how to clean fresh spinach, check out this vegancoach tutorial.
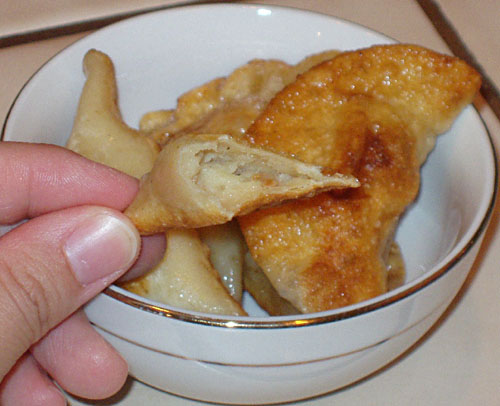 2-inch "Baked Potato" Pierogi Total time: Approximately 1.5 hours.
The August 2010 Daring Cooks’ Challenge was hosted by LizG of Bits n’ Bites and Anula of Anula’s Kitchen. They chose to challenge Daring Cooks to make pierogi from scratch and an optional challenge to provide one filling that best represents their locale.
Makes 4 generous servings, around 30 dumplings
Traditional Polish recipe, this is Anula’s family recipe
Dough Ingredients
2 to 2 1/2 cups all-purpose flour
1 large egg
1 teaspoon salt
1/2 to 1 cup lukewarm water
Filling Ingredients
3 big potatoes, cooked & mashed (1 1/2 cup instant or leftover mashed potatoes is fine too)
1 cup cottage cheese, drained I went with cheddar, and I omitted the Tbsp of melted butter
1 onion, diced & sauteed in butter until clear I went all the way to gold and sweet, with 1/2 tsp of garlic, too
3 slices of streaky bacon, diced and fried till crispy
1 egg yolk (from medium egg) Bah! I put the whole egg in!
1 tablespoon butter, melted omitted
1/4 teaspoon salt I put 1/2 tsp.
pinch of pepper to taste 1/4 tsp it is.
1/4 tsp of ground rosemary
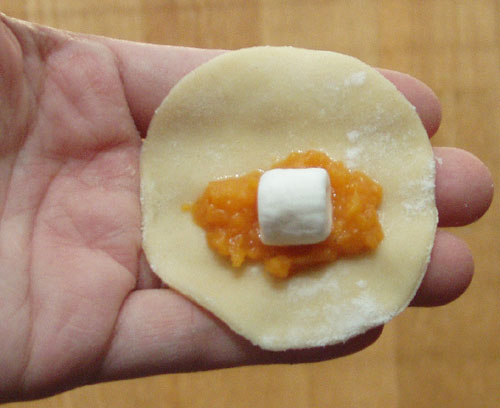 2-inch "Sweet Potato Pie" Pierogi 1. Combine all the ingredients for the filling (it‟s best to use one‟s hands to do that) put into the bowl, cover and set aside in the fridge until you have to use it.
2. Place 2 cups flour in a large bowl or on a work surface and make a well in the center. Break the egg into it, add the salt and a little lukewarm at a time (in my situation 1/2 cup was enough). Bring the dough together, kneading well and adding more flour or water as necessary. Cover the dough with a bowl or towel. You‟re aiming for soft dough. Let it rest 20 minutes.
3. On a floured work surface, roll the dough out thinly (1/8” or about 3 millimeters) cut with a 2-inch (5 cm) 4-inch round or glass. Spoon a portion (teaspoon will be the best) of the filling into the middle of each circle. Fold dough in half and pinch edges together. Gather scraps, re-roll and fill. Repeat with remaining dough.
4. Bring a large, low saucepan of salted water to boil. Drop in the pierogi, not too many, only single layer in the pan! Return to the boil and reduce heat. When the pierogi rise to the surface, continue to simmer a few minutes more ( usually about 5 minutes). Remove one dumpling with a slotted spoon and taste if ready. When satisfied, remove remaining pierogi from the water.
5. Serve immediately preferably with crème fraiche or fry. Cold pierogi can be fried. Boiled Russian pierogi can be easily frozen and boiled taken out straight from the freezer.
6. Fry in a pan with melted butter until golden brown on both sides, about 5 minutes… OR toast in a toaster oven 10 minutes or until puffy… OR bake at 350F for 10 minutes or until puffy.
I freeze mine on a cookie sheet before boiling them, and I just increase the cook time by 2 minutes if it’s frozen when I first put it in – no problem. I was really favoring the boiled-then-pan-fried method, until I thought I’d test out the toaster oven; boiling then tossing in the toaster oven makes a nice puffy, soft, slightly chewy pierogi and has less oil than the pan-fried. Every cook method I’ve tried has been incredibly tasty, so long as I boiled them first, before doing something else, and they taste fine just boiled, too.
I found that I liked the 4-inch circular cutter over the 2-inch cutter. The difference is a tablespoon of filling in a 4-inch or a teaspoon of filling in the smaller one. If you’re looking for bite-size, go with the 2-inch cutter; we prefer to make them finger-food rather than bite-size, and the 4-inch works for me. Cooking time is only increased by a minute or two, depending on how big the boiling pot is and how many pierogi are in the pot!
Other filling ideas:
meat and cabbage … soybeans … sauerkraut, mushrooms and carrots …
sweet potatoes and marshmallows … fruit …
 Curried beef with vegetables on rice Total time: Approximately 1 hour.
The July 2010 Daring Cooks’ Challenge was hosted by Margie of More Please and Natashya of Living in the Kitchen with Puppies. They chose to challenge Daring Cooks to make their own nut butter from scratch, and use the nut butter in a savory recipe.
1 pound sliced beef
14 ounces (1 can) coconut milk
2/3 cup peanut butter or other nut butter*
1 carrot, sliced or julienned
1/2 bushel of fresh spinach, rinsed well
1/4 cup Thai red curry paste or more to taste
1/4 cup soy sauce (or 2 Tbsp fish sauce)
1/4 cup loose (not packed) brown sugar
1 Tbsp chopped onions (optional)
1 Tbsp vegetable or other oil
* To make your own nut butter, process in a food processor an amount of nuts equal to double what the recipe requires. In this case, I used 1.5 cups of salted, unshelled peanuts, and processed until a smooth paste formed. Some nut butter might require oil (to process and make smooth) and salt (to taste).
This is a stirring-constantly stir fry.
Heat oil in a large skillet on medium-high. Add onions (it should sizzle) and cook until clear or golden brown, 3-5 minutes. Add sliced beef and cook until brown on all sides, 2-3 minutes. Add curry paste and mix well until all pieces of meat are coated.
Add carrots, coconut milk (remember to shake it before opening it!), and peanut butter. Stir well. Add soy sauce and brown sugar, mix well, and cook until it just starts to boil. Cover and reduce heat to low, cooking until the carrots are tender or desired doneness, 5-10 minutes. If you like your carrots firm, skip the reduction.
Add spinach and stir well until the spinach wilts and is completely covered in sauce.
Serves 4-6.
This is a little more sauce than there is food to coat, so if you have more vegetables, you should probably add them.
The flavor of your red curry paste will vary, so use caution if you don’t like a lot of heat. I never put seafood anything in my curry paste, and I always use the full amount of peppers, because you never know if you’ll get “lame duck” peppers instead of the good hot kind you really want.
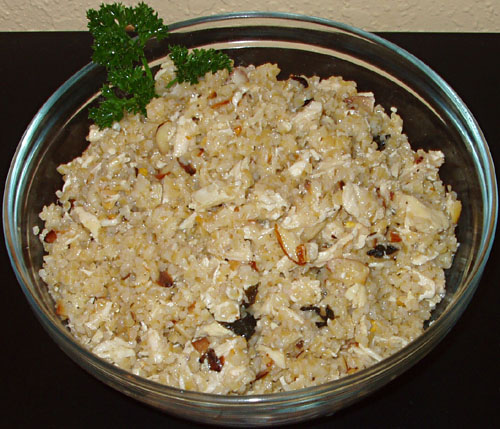 Bulgur Chicken Salad Total time: 20 minutes, plus chicken cooking time
Adapted from Clean Eating Magazine (March/April 2010).
2 boneless, skinless chicken breasts, cooked and shredded or cubed
2 cups chicken broth
1 cup fine-grain bulgur wheat
1/4 cup almond slivers, toasted
1/4 cup mint leaves, chopped (optional)
2 Tbsp olive oil
2 Tbsp lemon juice
2 tsp red pepper flakes
1/2 tsp ground cumin or to taste
salt and pepper to taste
In a small saucepan, bring chicken broth to a boil. Place bulgur in a small-medium bowl. Add chicken broth to bulgur and let set for 5-10 minutes, until most or all of the broth has been absorbed.
In a medium bowl, mix together oil, lemon juice, and seasonings. Add shredded chicken, and mix well to coat. Add almonds and mint, toss to coat. Add bulgur and mix well.
Serve cold or room temperature.
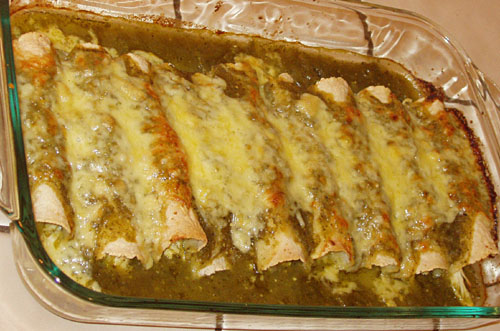 Enchiladas Verde Con Pollo Total time: Plan for 3 hours your first time, 2 hours each time after that.
The 2010 May Daring Cooks challenge was hosted by Barbara of Barbara Bakes and Bunnee of Anna+Food, and they chose a delicious Stacked Green Chile & Grilled Chicken Enchilada recipe in celebration of Cinco de Mayo! The recipe, featuring a homemade enchilada sauce was found on www.finecooking.com and written by Robb Walsh.
6-8 fresh Anaheim chiles (or 4-5 pasillas)
4-6 tomatillos – peeled, with stems removed
4 cups Chicken broth
1 clove Garlic, minced
2 teaspoons yellow onion, minced
1 teaspoon dried oregano
½ tsp Kosher salt (add more to taste)
¼ tsp Black Pepper (add more to taste)
Hot sauce, your favorite (optional)
2 Boneless chicken breasts (you can also use bone-in chicken breasts or thighs)
3 tablespoons Olive oil or other neutral vegetable oil (use more as needed)
Kosher salt and pepper
12 Small Corn tortillas (5-6 inch/13-15 cm). (you can also use wheat tortillas or other wraps)
6 ounces grated Monterey Jack, 170 grams (other cheeses (cheddar, pepper jack, Mexican cheeses) can be used. Just be sure they melt well and complement the filling)
Cilantro for garnish, chopped and sprinkled (optional)
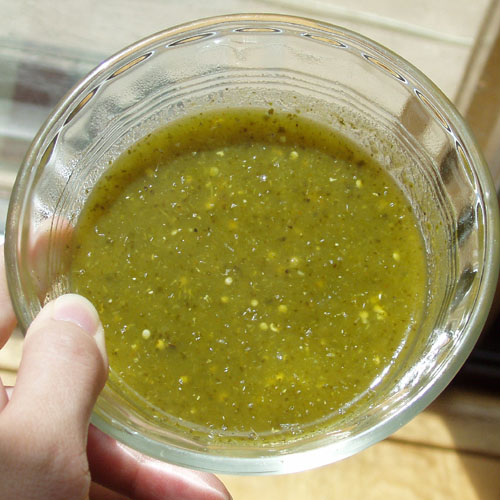 Pureed Peppers and Tomatillos Directions:
Roasting Fresh Chiles
1. Coat each chile with a little vegetable oil. If you are doing only a couple chiles, using the gas stove works. For larger batches (as in this recipe), grilling or broiling is faster.
2. Lay the oiled chiles on the grill or baking sheet (line pan with foil for simpler clean-up). Place the grill or broil close to the element, turning the chiles so they char evenly. They should be black and blistered.
3. As they are completely charred (they will probably not all be done at once), remove them to a bowl and cover with plastic. Let them rest until they are cool, about 10 minutes.
4. Pull on the stem and the seed core MAY pop out. Open the chile and remove the seeds. Turn the chile skin side up and with a paring knife, scrape away the skin. Sometimes it just pulls right off, sometimes you really have to scrape it. (I kept the seeds in the pepper.)
5. DO NOT RINSE!
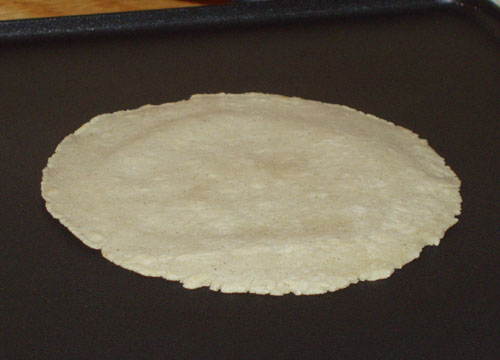 Corn tortillas made with masa Green Chile Sauce
1. Put a medium saucepan of water on to boil. Boil the tomatillos until soft, 5 to 10 minutes. You can also grill the tomatillos until soft. (I prefer to grill mine, along with all peppers, onions, and garlic.)
2. Drain and puree in a blender or food processor, add roasted green chiles, peppers, onions and garlic, and blend some more.
3. Return the tomatillo-chile mixture to the saucepan along with the chicken broth, oregano, salt and pepper.
4. Bring to a boil over medium-high heat and then reduce the heat and simmer for 20 minutes.
5. Adjust seasonings and add hot sauce if you want a little more heat.
Stacked Green Chile and Grilled Chicken Enchiladas
1. Heat a gas grill to medium high or build a medium-hot charcoal. Coat the chicken with olive oil and season well with salt and pepper. Preheat oven to 450 degrees.
2. Grill the chicken until just cooked through, 4-5 minutes a side for boneless chicken breasts.
3. Cool and then slice into thin strips or shred.
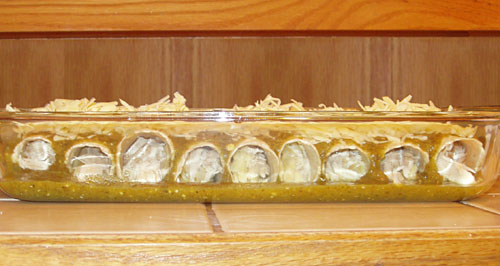 Uncooked Enchiladas Skip steps 4-12 if you’re just rolling your enchiladas.
4. In a small skillet, heat 3 tablespoons oil over medium-high heat until very hot. Dip the edge of a tortilla into the oil to check – it should sizzle immediately.
5. Using tongs, put a tortilla into the pan and cook until soft and lightly brown on each side, about 15-20 seconds per side (at the most).
6. Drain on paper towels.
7. Add oil as needed and continue until all 12 tortillas are done.
8. In a baking dish large enough to hold four separate stacks of tortillas, ladle a thin layer of sauce.
9. Lay four tortillas in the dish and ladle another ½ cup (4 ounces/112 grams) of sauce over the tortillas.
10. Divide half the chicken among the first layer of tortillas, top with another ½ cup of sauce and 1/3 of the grated cheese.
11. Stack another four tortillas, top with the rest of the chicken, more sauce and another third of the cheese.
12. Finish with the third tortilla, topped with the remaining sauce and cheese.
13. Bake until the sauce has thickened and the cheese melted, about 20 minutes. Let rest for 5-10 minutes.
14. To serve, transfer each stack to a plate. Spoon any leftover sauce over the stacks and sprinkle with cilantro, if you wish. The stacks may also be cooked in individual gratin dishes.
My combination of peppers and chicken broth yielded enough sauce for two dishes. I made these with homemade corn tortillas the first night, with shredded chicken, and then with store-bought flour tortillas and shredded pork the second night. I think the corn tortillas had better texture and flavor, but the shredded pork was far tastier than the plain salt&pepper chicken.
I always use extra sharp white cheddar cheese for “your choice shredded cheese”.
I prefer to boil my meats and shred them, rather than grilling or pan frying. I also feel it’s helpful to season them with at *least* salt, pepper, and some sort of chili powder.
I chose to roll my enchiladas instead of stacking them. If you choose to roll your enchiladas, it’s very important to put sauce on the bottom of the pan, under your rolled enchiladas.
I found this recipe and my adjusted process to be really easy and convenient for me, and it tastes better than the recipe I had been using, so it’s definitely a keeper.
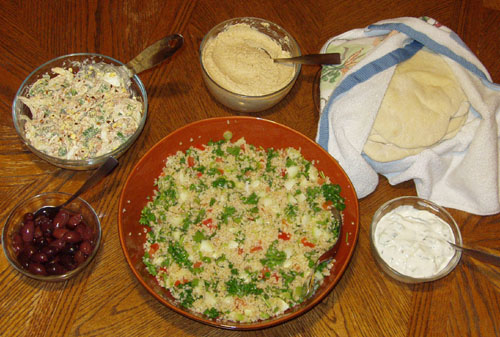 Olives, piyaz, hummus, pita bread, cucumber raita, and tabouli. Total time: Approximately 5 hours.
The 2010 February Daring Cooks Challenge was hosted by Michele of Veggie Num Nums. Michele chose to challenge everyone to present a mezze table. The required recipes were pita bread (here) and hummus.
Recipe adapted from Flatbreads & Flavors by Jeffrey Alford and Naomi Duguid
2 teaspoons regular dry yeast (.43 ounces/12.1 grams)
2.5 cups lukewarm water (21 ounces/591 grams)
6 cups all-purpose flour (17.5 -21 ounces/497-596 grams)
1 tablespoon table salt (.50 ounces/15 grams)
2 tablespoons olive oil (.95 ounces/29 ml)
Directions:
1. In a large bread bowl, sprinkle the yeast over the warm water. Stir to dissolve. Stir in 3 cups flour, a cup at a time, and then stir 100 times, in the same direction to activate the gluten. Let this sponge rest for 90 minutes.
2. Sprinkle the salt over the sponge and stir in the olive oil. Mix well. Add more flour, a cup at a time, until the dough is too stiff to stir. Let the dough rest 10-15 minutes.
3. Turn it out onto a lightly floured surface and knead for 8 to 10 minutes, until smooth and elastic. Rinse out the bowl, dry, and lightly oil. Return the dough to the bowl and cover with plastic wrap. Let rise until at least doubled in size, approximately 90 minutes.
4. Place a pizza stone, or two small baking sheets, on the bottom rack of your oven, leaving a 1-inch gap all around between the stone or sheets and the oven walls to allow heat to circulate. Preheat the oven to 450F (230C).
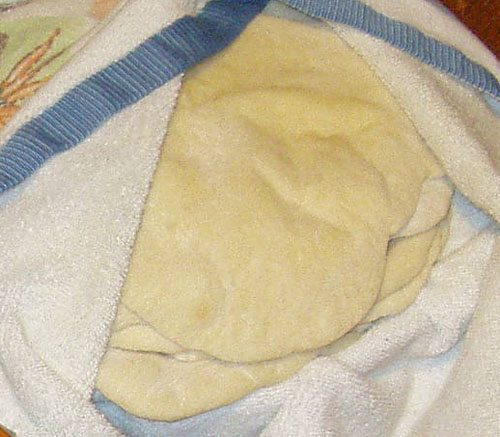 Pita Bread 5. Lightly flour the top of the dough and both sides of your hands. Gently punch down the dough. Divide the dough in half, and then set half aside, covered, while you work with the rest. Divide into 8 equal pieces and flatten each piece with lightly floured hands. Roll out each piece to a circle 8 to 9 inches in diameter and less than 1/4 inch thick. Keep the rolled-out breads covered until ready to bake, but do not stack.
6. Place 2 breads, or more if your oven is large enough, on the stone or baking sheets, and bake for 4 to 6 minutes, or until each bread has gone into a full balloon. If for some reason your bread doesn’t puff up, don’t worry. Wrap the baked breads together in a large kitchen towel to keep them warm and soft while you bake the remaining rolled-out breads. Then repeat with the rest of the dough.
Makes 16 large pitas.
Shown here with kalamata olives, Almost Turkish Piyaz, hummus, cucumber raita, and tabouli.
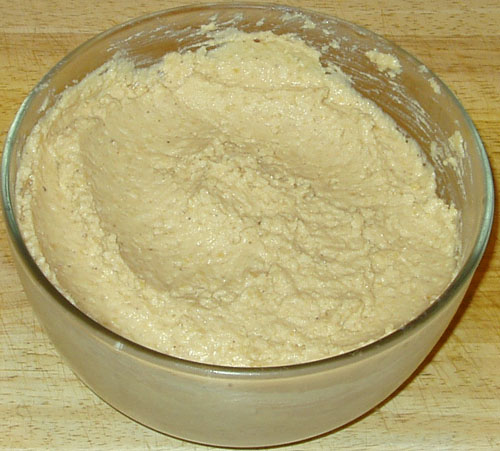 Hummus Recipe adapted from The New Book of Middle Eastern Food by Claudia Roden
Prep Time: Hummus can be made in about 15 minutes once the beans are cooked. If you’re using dried beans you need to soak them overnight and then cook them the next day which takes about 90 minutes.
1.5 cups dried chickpeas, soaked in cold water overnight (or substitute well drained canned chickpeas and omit the cooking) (10 ounces/301 grams)
2-2.5 lemons, juiced (3 ounces/89ml/6 Tbsp)
2-3 garlic cloves, peeled and crushed (2 tsp)
a big pinch of salt
4 tablespoons tahini (sesame paste) OR use peanut butter or any other nut butter—feel free to experiment) (1.5 ounces/45 grams)
2 tsp ground sumac
Directions:
1. Drain and boil the soaked chickpeas in fresh water for about 1 ½ hours, or until tender. Drain, but reserve the cooking liquid.
2. Puree the beans in a food processor (or you can use a potato masher) adding the cooking water as needed until you have a smooth paste.
3. Add the rest of the ingredients and mix well. Adjust the seasonings to taste.
I normally like to edit the Daring Cooks recipes to make them more understandable outside the DK, but in this instance, I thought I’d keep all of the extra notations in the ingredients. Really, if you’re using dried garbanzo beans, your directions are different than if you’re using canned beans. And sometimes your canned beans are too firm and need to be boiled anyway. It’s something you’ll just have to decide each time you try to make hummus. If you’re lucky like me, you have a pressure cooker that does all the work for you, in 30 minutes or less.
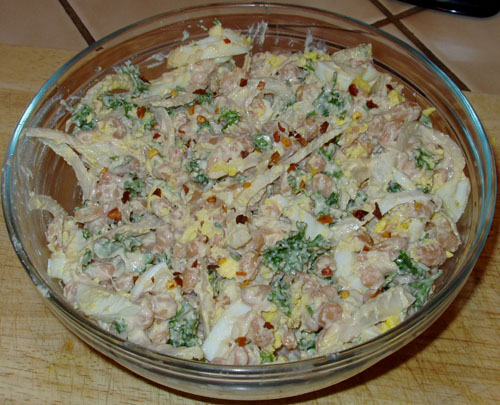 Almost Turkish Piyaz Total time: Approximately 15 minutes.
Adapted from Burcu’s Antalya Bean Salad (Antalya Usulü Piyaz) on Almost Turkish Recipes.
2 cups of cooked northern beans
1/2 onion, cut finely in half-moons
1/2 cup parsley, finely chopped
1 Tbsp crushed pepper
2 hard boiled eggs, sliced or diced
Dressing:
1/4 cup tahini
1/4 cup vinegar
1/4 cup lemon juice
2 cloves of garlic, minced
Mix together dressing ingredients, set aside.
In a small bowl, knead onion slices with 1 tsp salt. Rinse and drain.
In a medium large bowl, mix together beans and onions. Stir in dressing, coat well. Fold in parsley and eggs. Sprinkle with crushed red peppers.
Serve chilled or room temperature.
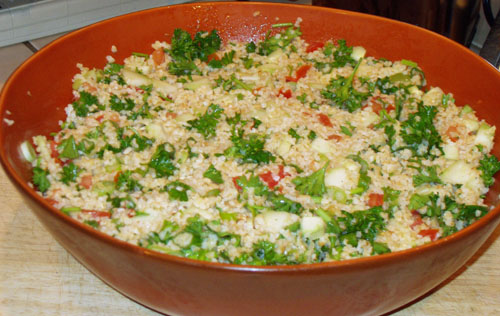 Tabouli Total time: 35 minutes.
Adapted from Holy Land Brand’s website.
2 cups dry bulgur wheat
2 cups very hot water
1 cucumber, chopped and blotted with paper towel
1-3 small tomatoes, chopped
3 green onions, finely chopped
2 cups fresh chopped parsley
1 clove garlic, minced
Dressing:
1/2 cup fresh lemon juice
1/2 cup extra virgin olive oil
1 tablespoon pepper, or to taste
2 teaspoons salt, or to taste
In a small bowl, mix together dressing ingredients, set aside.
Soak the wheat in the hot water until the water is absorbed, about 30 minutes. Drain any excess water, if necessary, and squeeze dry. I normally take this time to chop up all my vegetables.
Combine the salad ingredients, including wheat, in a large bowl. Gently stir dressing into the salad.
Serve chilled or at room temperature. Makes about 8 cups, 12 to 16 servings.
This made a whole lot of salad. We ate it for almost 4 days, with lots of help from friends, in pita bread with other assorted yummies. I’ll definitely be halving this recipe in the future (I don’t think quartering it will work very easily).
 Cucumber Raita Total time: 15 minutes.
Recipe adapted from The Indian Grocery Store Demystified by Linda Bladholm
1 medium cucumber, peeled and most of the seeds removed
1 teaspoon cumin seeds (.1 ounce/3 grams) OR use a small pinch of dried cumin—to taste
2 cups plain whole milk or Greek yogurt (17 ounces/473ml)
1 garlic clove, peeled and minced
fresh cilantro, chopped, a couple pinches or more to taste
cayenne pepper, just a pinch to use as a garnish (optional)
Directions:
1. Peel cucumber, de-seed, and dice. Blot off moisture with paper towels.
2. Toast cumin seeds for a few seconds in a small, heavy frying pan over high heat.
3. In a bowl, stir yogurt until it is smooth.
4. Mix in the cumin, garlic and coriander leaves.
5. Stir in the cucumber and sprinkle with cayenne. Chill before serving.
|
|


