Total time: Approximately 1.5 hours.
The August 2010 Daring Cooks’ Challenge was hosted by LizG of Bits n’ Bites and Anula of Anula’s Kitchen. They chose to challenge Daring Cooks to make pierogi from scratch and an optional challenge to provide one filling that best represents their locale.
Makes 4 generous servings, around 30 dumplings
Traditional Polish recipe, this is Anula’s family recipe
Dough Ingredients
2 to 2 1/2 cups all-purpose flour
1 large egg
1 teaspoon salt
1/2 to 1 cup lukewarm water
Filling Ingredients
3 big potatoes, cooked & mashed (1 1/2 cup instant or leftover mashed potatoes is fine too)
1 cup cottage cheese, drained I went with cheddar, and I omitted the Tbsp of melted butter
1 onion, diced & sauteed in butter until clear I went all the way to gold and sweet, with 1/2 tsp of garlic, too
3 slices of streaky bacon, diced and fried till crispy
1 egg yolk (from medium egg) Bah! I put the whole egg in!
1 tablespoon butter, melted omitted
1/4 teaspoon salt I put 1/2 tsp.
pinch of pepper to taste 1/4 tsp it is.
1/4 tsp of ground rosemary
1. Combine all the ingredients for the filling (it‟s best to use one‟s hands to do that) put into the bowl, cover and set aside in the fridge until you have to use it.
2. Place 2 cups flour in a large bowl or on a work surface and make a well in the center. Break the egg into it, add the salt and a little lukewarm at a time (in my situation 1/2 cup was enough). Bring the dough together, kneading well and adding more flour or water as necessary. Cover the dough with a bowl or towel. You‟re aiming for soft dough. Let it rest 20 minutes.
3. On a floured work surface, roll the dough out thinly (1/8” or about 3 millimeters) cut with a 2-inch (5 cm) 4-inch round or glass. Spoon a portion (teaspoon will be the best) of the filling into the middle of each circle. Fold dough in half and pinch edges together. Gather scraps, re-roll and fill. Repeat with remaining dough.
4. Bring a large, low saucepan of salted water to boil. Drop in the pierogi, not too many, only single layer in the pan! Return to the boil and reduce heat. When the pierogi rise to the surface, continue to simmer a few minutes more ( usually about 5 minutes). Remove one dumpling with a slotted spoon and taste if ready. When satisfied, remove remaining pierogi from the water.
5. Serve immediately preferably with crème fraiche or fry. Cold pierogi can be fried. Boiled Russian pierogi can be easily frozen and boiled taken out straight from the freezer.
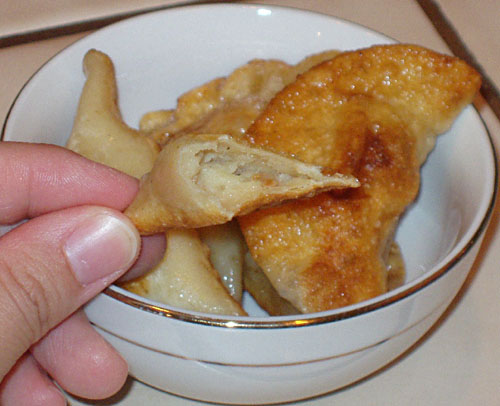
6. Fry in a pan with melted butter until golden brown on both sides, about 5 minutes… OR toast in a toaster oven 10 minutes or until puffy… OR bake at 350F for 10 minutes or until puffy.
I freeze mine on a cookie sheet before boiling them, and I just increase the cook time by 2 minutes if it’s frozen when I first put it in – no problem. I was really favoring the boiled-then-pan-fried method, until I thought I’d test out the toaster oven; boiling then tossing in the toaster oven makes a nice puffy, soft, slightly chewy pierogi and has less oil than the pan-fried. Every cook method I’ve tried has been incredibly tasty, so long as I boiled them first, before doing something else, and they taste fine just boiled, too.
I found that I liked the 4-inch circular cutter over the 2-inch cutter. The difference is a tablespoon of filling in a 4-inch or a teaspoon of filling in the smaller one. If you’re looking for bite-size, go with the 2-inch cutter; we prefer to make them finger-food rather than bite-size, and the 4-inch works for me. Cooking time is only increased by a minute or two, depending on how big the boiling pot is and how many pierogi are in the pot!
Other filling ideas:
meat and cabbage … soybeans … sauerkraut, mushrooms and carrots …
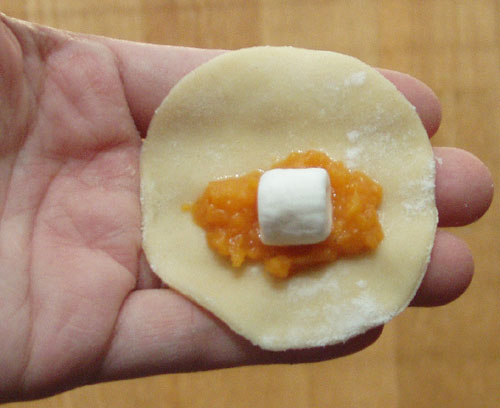
sweet potatoes and marshmallows … fruit …


Ok, you won! After reading your recipes I have to give up and try those pierogis again! Four different fillings! You rock…
Hahah! Thank you! To be honest, I had a wonderful time doing the pierogi challenge. The sweet potato ones I made taste like pumpkin pie when they’re seasoned and baked, really different and tasty. Frozen pierogi will definitely be added to my make-ahead list, with frozen gnocchi and dried cannelloni.