|
|
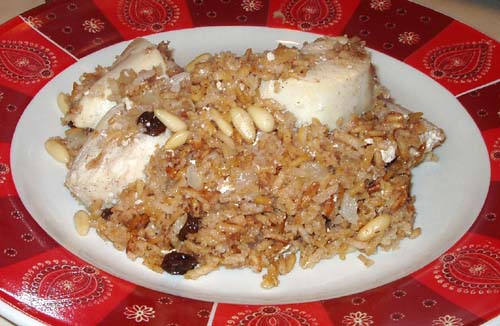 Cinnamon Raisin Rice with pine nuts and chicken Originally titled Lebanese Chicken and Rice with Pine Nuts, Raisins and Feta, this recipe comes from Nutrition Consultant Jeannette Turner, but I couldn’t find exactly what was Lebanese about it. Maybe if you swapped cinnamon for 5 spice.
1 lb. skinless chicken breasts, cubed
1 cup rice
2 cups water
1/2 onion, finely chopped
2 Tbsp olive oil, divided
1/3 cup raisins
1/3 cup pine nuts
1/2 tsp. Kosher salt
1 tsp. cinnamon
2 bay leaves
1 Tbsp. honey
crumbled feta cheese (optional)
Optional step I enjoy: Soak raisins in 1/2 cup of cool water, set aside.
In a large skillet or frying pan on medium high heat, cook rice in 1 Tbsp of oil until well browned. Cook rice with 2 cups of water, salt, cinnamon, bay leaves, and honey according to the directions on the package (hey, I use a rice cooker, so you’re on your own).
While the rice is cooking, fry chopped onions in 1 Tbsp of oil in the same skillet or pan 5-10 minutes or until golden brown. Add chopped chicken pieces and cook thoroughly (about 10 minutes). Drain raisins and add them with the pine nuts to the skillet. Cook for 2-3 minutes.
Remove bay leaves from rice. Combine rice and chicken mix into a large baking dish. Top with feta and broil for 5-8 minutes (or until the feta melts and starts to brown on top). If you’re using feta cheese, this broiling is vital because it changes the smell and taste of the feta.
I served mine with butternut squash, but I hear it goes well with green vegetables, too. This recipe is easily converted to vegetarian/vegan, for either main course or side dish.
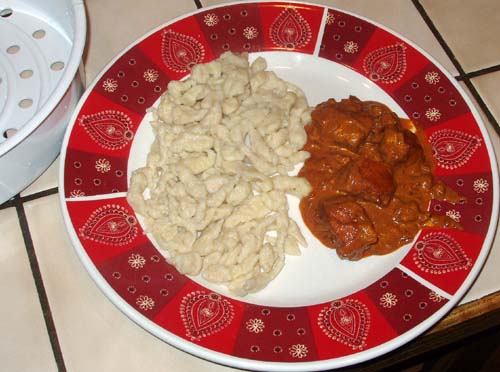 Spätzle with Chicken Paprikas Total time: 35 minutes
Steph from Stephfood was our Daring Cooks’ July hostess. Steph challenged us to make homemade noodles without the help of a motorized pasta machine. She provided us with recipes for Spätzle and Fresh Egg Pasta as well as a few delicious sauces to pair our noodles with!
Ingredients
2 large eggs
½ cup (120 ml) milk or buttermilk
1½ cups (360 ml) (210 gm) (7½ oz) all-purpose (plain) flour (approximately – have more on hand, in case)
up to 1 tablespoon (15 ml) of herbs and spices (optional – I added 1 tsp nutmeg instead)
1 tablespoon (15 ml) (3 gm) fresh parsley, chopped (optional decoration, I skipped this)
Directions:
1. In a large bowl, whisk together eggs, milk and any herbs and spices that you want to incorporate into the spätzle.
2. Incorporate the flour in small batches, by sifting in a small amount at a time and mixing until the flour is completely integrated. Keep adding flour until the dough becomes elastic, smooth and very hard to stir.
Boil a large pot of water. Dip a table spoon into the boiling water to wet it. To form the spätzle, fill the tablespoon about half way with dough, and release into the boiling water.
4. Boil for 15 to 20 minutes.
5. Drain the water from the spätzle. Because it’s full of fun craters where water can hide, you will need to drain it especially well. Toss with the chopped parsley.
Seen here paired with chicken paprikash.
I pushed my dough through these holes I found in what I think is a food processor salad bowl (I really have no idea, I just found this thing in my “miscellaneous drawer” in the kitchen). I got a little warm standing above the boiling water, but it was worth it. Because the pieces were so much smaller and more spätzle-y, I only had to cook them 8-10 minutes, but I had to do two batches.
This was so fast and easy, and it made a light and tasty noodle.
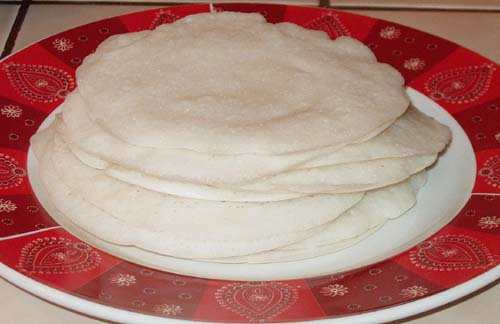 Appam, or hopper, is a rice pancake Mary, who writes the delicious blog, Mary Mary Culinary was our August Daring Cooks’ host. Mary chose to show us how delicious South Indian cuisine is! She challenged us to make Appam and another South Indian/Sri Lankan dish to go with the warm flat bread.
Total time: 12-16 hours.
Ingredients:
1 ½ cups (360 ml/300 gm/10½ oz) raw rice
1 ½ teaspoons (7½ ml/5 gm) active dry yeast
2 teaspoons (10 ml/9 gm) sugar
½ cup (120 ml) of coconut water or water, room temperature
1 ½ tablespoons (22½ ml/18 gm) cooked rice
½ teaspoon (2½ ml/3 gm) salt
about ½ cup (120 ml) thick coconut milk (from the top of an unshaken can)
Directions:
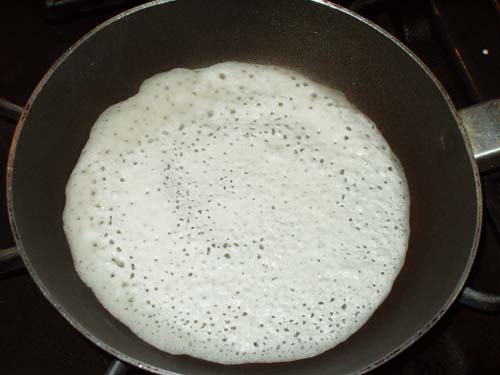 My edges weren't thin all the time, but it still worked out. 1. Soak the raw rice in 4 to 5 cups of water for 3 hours. I kept forgetting to do this, so I soaked overnight. Worked great. 😉
2. Dissolve the sugar in the coconut water or plain water and add the yeast. Set aside in a warm area for 10-15 minutes, until very frothy.
3. Drain the rice and grind it in a blender with the yeast mixture to make a smooth batter. You can add a bit of extra water if needed, but I did not. Add the cooked rice, and grind/blend to combine well.
4. Pour into a large bowl, cover and leave in a warm place for 8-12 hours. You not only want the mixture to rise and collapse, but to ferment. When it is ready, it will have a slightly sour and distinctly yeasty smell. Don’t worry–they are mild tasting when cooked!
5. Add the coconut milk and salt, and a bit of water if necessary, so that you have a batter that is just a bit thicker than milk. Notice how it bubbles after you add the coconut milk. I recommend test-cooking one before thinning the batter.
6. Heat your pan over medium heat. Wipe a few drops of oil over it using a paper towel. Stir the batter and pour in 3-4 tablespoons, depending on the size of the pan. Working quickly, hold the handle(s) and give the pan a quick swirl so that the batter comes to the top edge. Swirl once only, as you want the edges to be thin and lacy.
7. Cover the pan and cook for about 2 minutes. Uncover and check. The center should have puffed up a bit, and will be shiny, but dry to the touch. When ready, loosen the edges with a small spatula and serve immediately. These need to be served hot out of the pan.
The leftover batter can be refrigerated for a day or 2.
Wow. These are new and amazing to me, and I will be making them again and again. I enjoyed them so much, I was looking around for more.
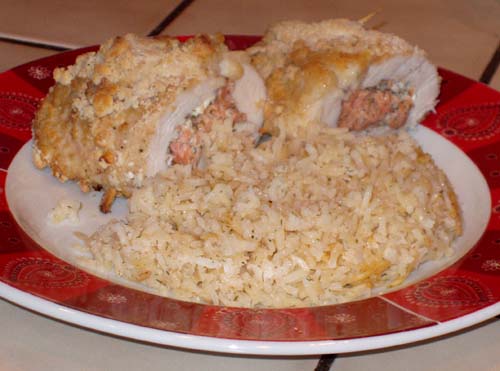 Dilly Sour Rice served with salmon stuffed chicken breasts. Total time: Approximately 45 minutes.
3 cups water
2 cups rice
2 Tbsp butter
1/2 c sour cream
1 tsp minced garlic
1/2 tsp paprika
1/2 tsp salt
1/2 tsp dill weed
1/4 tsp pepper
1/4 tsp dried mint leaves
Mix sour cream and seasonings, set aside.
In a large, deep skillet, melt butter on medium-high heat. Add rice and cook until golden brown (about 10 minutes), stirring often.
Add sour cream mix, and stir well. Add water and stir until sour cream is mostly dissolved. Cover tightly. Leave it this way for 5 minutes, then reduce heat to low.
Let the rice simmer for 15 minutes. Then turn the heat off and let it steam for another 5-10 minutes. Fluff and serve.
Serves 6-8.
Shown here with salmon stuffed chicken breasts.
 Vegetarian Dolma Total time: 3 hours
Our October 2010 hostess, Lori of Lori’s Lipsmacking Goodness, has challenged The Daring Cooks to stuff grape leaves. Lori chose a recipe adapted from The New Book of Middle Eastern Food (a Borzoi Book by Claudia Roden, published by Alfred A. Knopf).
40 – 50 preserved or fresh grape leaves.
1¼ cups long grain rice
1 large tomato, peeled and finely chopped
1 large onion, finely chopped or 4 tablespoons finely chopped scallions
2 tablespoons finely chopped flat leaf parsley
2 tablespoons crushed dried mint
¼ teaspoon ground cinnamon
¼ teaspoon ground allspice
1 teaspoon dry dill weed
3 or 4 cloves garlic, minced
Salt and pepper
2/3 cup (160 ml) extra-virgin olive oil
1 teaspoon (5 ml) (5 gm) sugar
Juice of 1 lemon or more
Notes:
If using grape leaves preserved in brine, to remove salt put them in a bowl and pour boiling water over them. Make sure that the water penetrates well between the layers, and leave them soaking for about twenty minutes, then change the water a time or two using fresh cold water.
If using fresh leaves, plunge a few at a time in boiling water for a few seconds only, until they become limp, and lift them out.
Directions:
 Army of Dolmas 1. Pour boiling water over the rice and stir well, then rinse with cold water and let drain.
2. Mix the rice with the chopped tomatoes, onion or scallion, garlic, parsley, mint, cinnamon, allspice, dill, salt and pepper to taste.
3. Place a grape leaf on a flat surface, vein side up.
4. Place about two teaspoons (10 ml) of the filling in the center of the leaf, near the stem edge.
5. Roll the leaf end to end, starting from the stem edge. As you roll, fold the sides of the leaf in toward the center. The leaf should resemble a small cigar, about 2 to 2 1/2 inches (50 mm to 65mm) long.
6. Repeat with the remaining leaves and filling.
(You can freeze the stuffed grape leaves at this point. Just line a baking sheet with wax paper. When firmly frozen, transfer to an airtight plastic bag, place back in the freezer.)
7. Pack the stuffed leaves tightly in a large pan lined with tomato slices or imperfect grape leaves. The tightness will help prevent the rolls from unraveling.
8. Mix together olive oil, 2/3 cup (160 ml) water, sugar and lemon juice and pour over the stuffed leaves. Put a small heat proof plate on top of the leaves to prevent them from unwinding, cover the pan and simmer very gently for about 1 hour, until the rolls are thoroughly cooked, adding water occasionally, if needed, as the liquid in the pan becomes absorbed. Cool in the pan before turning out. Serve cold.
I used the given recipe and somehow ended up making 64 dolmas. I didn’t measure out 2 teaspoons every time, but it looked close enough to me. If you have two cups of filling, you should be able to make 48 dolmas.
I found it was best to cook them for an hour if I did my large pan (approximately 30 dolmas), but only 35 for my small pan (an even dozen). Then I let them sit in the pan for 30-40 minutes afterward before serving them warm. I like them warm, but they were still great cold the next day.
For use the next day, just leave them in the pan when you put them in the refrigerator. Heat on low for 15-20 minutes or serve cold. I froze uncooked dolmas and cooked them straight from the frozen state with great success.
 Apple Ginger Pierogi Total time: Approximately 1.5 hours.
The August 2010 Daring Cooks’ Challenge was hosted by LizG of Bits n’ Bites and Anula of Anula’s Kitchen. They chose to challenge Daring Cooks to make pierogi from scratch and an optional challenge to provide one filling that best represents their locale. My go-to solution for dessert is always apples and ginger.
Dough Ingredients
2 to 2 1/2 cups all-purpose flour
1 large egg
1 teaspoon salt
1/8 tsp ground cardamom
1/8 tsp ground turmeric
1/8 tsp ground coriander
1/2 to 1 cup lukewarm water
Filling Ingredients
1 cup finely chopped apple
1/2 cup minced ginger
1 Tbsp plain or vanilla yogurt
2 tsps cinnamon
1/8 tsp salt
Mix together filling ingredients and chill completely before use.
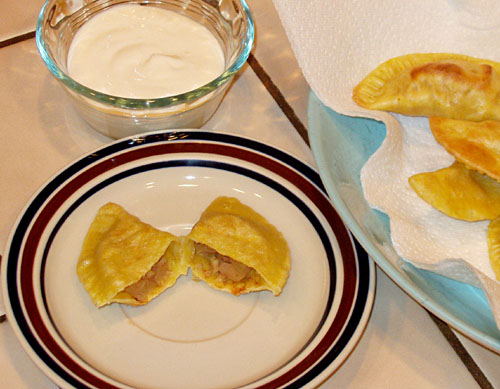 Apple ginger pierogi with fruit dip Sift together seasonings and 2 cups of flour into a large bowl and make a well in the center. Break the egg into it, add a little water at a time (in my situation 1/2 cup was enough). Bring the dough together, kneading well and adding more flour or water as necessary. Cover the dough and let it rest 20 minutes.
On a floured work surface, roll the dough out thinly (1/8” or as thin as you can go) cut with a 4-inch round or glass. Spoon a portion (tablespoon will be the best) of the filling into the middle of each circle. Fold dough in half and pinch edges together. Gather scraps, re-roll and fill. Repeat with remaining dough.
Bring a large, low saucepan of salted water to boil. Drop in the pierogi, in a single layer in the pan. Return to the boil and reduce heat to medium. When the pierogi rise to the surface, continue to simmer a few minutes more (usually about 5 minutes), until they’ve started to puff out.
Toast in a toaster oven at 375F for 10 minutes or until puffy and light brown.
Shown here served with a fruit dip (2 parts yogurt, 2 parts cream cheese, 1 part confectioner’s sugar.
Just. Wow. Yum. Apples and ginger always win for me.
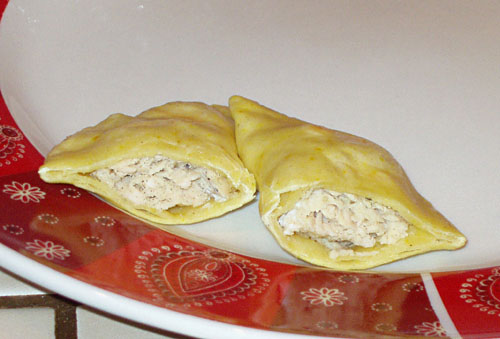 Cardamom chicken pierogi Total time: Approximately 1.5 hours.
The August 2010 Daring Cooks’ Challenge was hosted by LizG of Bits n’ Bites and Anula of Anula’s Kitchen. They chose to challenge Daring Cooks to make pierogi from scratch and an optional challenge to provide one filling that best represents their locale. This recipe is inspired by Elise’s Cardamom Honey Chicken
Dough Ingredients
2 to 2 1/2 cups all-purpose flour
1 large egg
1 teaspoon salt
1/8 tsp ground cardamom
1/8 tsp ground turmeric
1/8 tsp ground coriander
1/2 to 1 cup lukewarm water
Filling Ingredients
1 pound cooked chicken, shredded
1 Tbsp honey
2 tsp sherry
2 tsp lemon juice
1/2 tsp cardamom
1/2 tsp pepper
salt to taste
Mix together filling ingredients and chill completely before use.
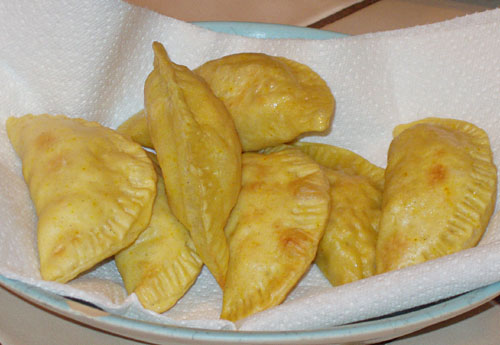 Cardamom chicken pierogi Sift together seasonings and 2 cups of flour into a large bowl and make a well in the center. Break the egg into it, add a little water at a time (in my situation 1/2 cup was enough). Bring the dough together, kneading well and adding more flour or water as necessary. Cover the dough and let it rest 20 minutes.
On a floured work surface, roll the dough out thinly (1/8” or as thin as you can go) cut with a 4-inch round or glass. Spoon a portion (tablespoon will be the best) of the filling into the middle of each circle. Fold dough in half and pinch edges together. Gather scraps, re-roll and fill. Repeat with remaining dough.
Bring a large, low saucepan of salted water to boil. Drop in the pierogi, in a single layer in the pan. Return to the boil and reduce heat to medium. When the pierogi rise to the surface, continue to simmer a few minutes more (usually about 5 minutes), until they’ve started to puff out.
Toast in a toaster oven at 375F for 10 minutes or until puffy and light brown.
I’m not sure if it was the honey or the sherry or, really, I have no idea… but the dough was very chewy after it was cooked. I’m glad I enhanced the flavor of the chicken with flavored dough; a very worthwhile experiment.
I couldn’t come up with a sauce to serve with these (for dipping or on top). Sour cream didn’t at all taste right.
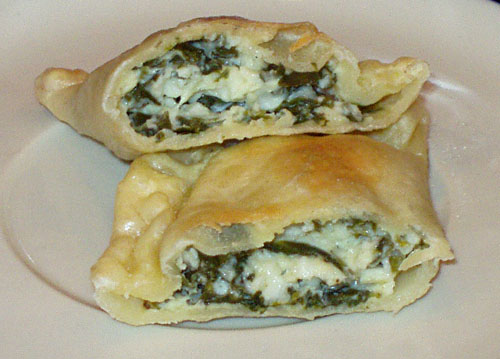 Spaniko-pierogi Total time: Approximately 1.5 hours.
The August 2010 Daring Cooks’ Challenge was hosted by LizG of Bits n’ Bites and Anula of Anula’s Kitchen. They chose to challenge Daring Cooks to make pierogi from scratch and an optional challenge to provide one filling that best represents their locale. Potatoes are local to me (my state ranks “first in per-acre yield of potatoes, far above other potato-producing states and countries, and 57 percent more potatoes per acre” than Idaho), but I thought I’d go with spinach (which my region has 2000-3000 acres dedicated to seed growth alone).
Dough Ingredients
2 to 2 1/2 cups all-purpose flour
1 large egg
1 teaspoon salt
1/2 to 1 cup lukewarm water
Filling Ingredients
1 bunch of spinach, cleaned, rinsed, separated and drained
1/2 c feta cheese
1/2 onion, diced & sauteed in butter until golden brown
1 egg
1/4 tsp salt (optional)
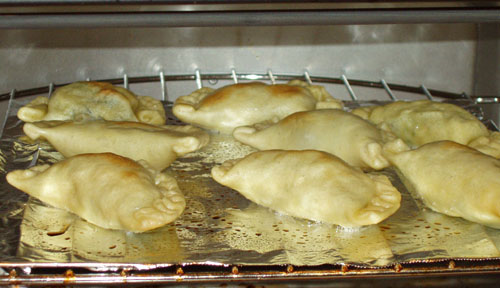 Spaniko-pierogi in the toaster oven Chop spinach leaves into “salad size” pieces. Place in a large, microwave safe bowl and microwave on high for 1 minute. The spinach should wilt to about 1/4 of the original size. You may want to drain in a colander. Let cool 3-5 minutes. Scoop your wilted spinach up in one clump if you can and cut it into bite sized squares. Transfer to a towel (or a pair of paper towels), and attempt to squeeze the remaining water out or let it drain in the towel for 5-10 minutes.
Mix together with remaining filling ingredients and chill completely before use.
Place 2 cups flour in a large bowl and make a well in the center. Break the egg into it, add the salt and a little water at a time (in my situation 1/2 cup was enough). Bring the dough together, kneading well and adding more flour or water as necessary. Cover the dough and let it rest 20 minutes.
On a floured work surface, roll the dough out thinly (1/8” or as thin as you can go) cut with a 4-inch round or glass. Spoon a portion (tablespoon will be the best) of the filling into the middle of each circle. Fold dough in half and pinch edges together. Gather scraps, re-roll and fill. Repeat with remaining dough.
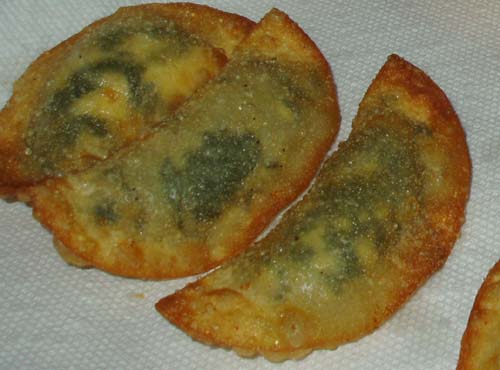 Deep Fried Spaniko-pierogi Bring a large, low saucepan of salted water to boil. Drop in the pierogi, in a single layer in the pan. Return to the boil and reduce heat to medium. When the pierogi rise to the surface, continue to simmer a few minutes more (usually about 5 minutes), until they’ve started to puff out.
Toast in a toaster oven at 375F for 10 minutes or until puffy and light brown.
I find phyllo dough to be expensive if purchased and a real pain to make from scratch. This works for me, and it’s awesome.
There’s a difference in using fresh spinach versus frozen spinach, and that difference is mostly moisture and texture. If you’re not sure how to clean fresh spinach, check out this vegancoach tutorial.
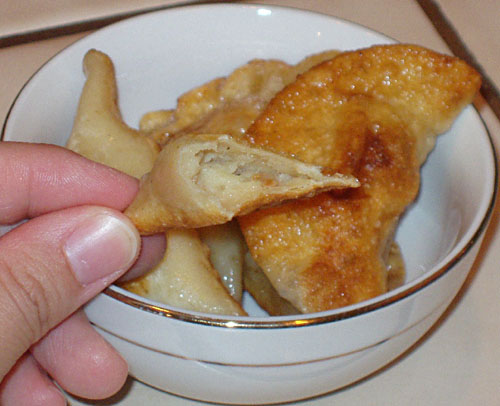 2-inch "Baked Potato" Pierogi Total time: Approximately 1.5 hours.
The August 2010 Daring Cooks’ Challenge was hosted by LizG of Bits n’ Bites and Anula of Anula’s Kitchen. They chose to challenge Daring Cooks to make pierogi from scratch and an optional challenge to provide one filling that best represents their locale.
Makes 4 generous servings, around 30 dumplings
Traditional Polish recipe, this is Anula’s family recipe
Dough Ingredients
2 to 2 1/2 cups all-purpose flour
1 large egg
1 teaspoon salt
1/2 to 1 cup lukewarm water
Filling Ingredients
3 big potatoes, cooked & mashed (1 1/2 cup instant or leftover mashed potatoes is fine too)
1 cup cottage cheese, drained I went with cheddar, and I omitted the Tbsp of melted butter
1 onion, diced & sauteed in butter until clear I went all the way to gold and sweet, with 1/2 tsp of garlic, too
3 slices of streaky bacon, diced and fried till crispy
1 egg yolk (from medium egg) Bah! I put the whole egg in!
1 tablespoon butter, melted omitted
1/4 teaspoon salt I put 1/2 tsp.
pinch of pepper to taste 1/4 tsp it is.
1/4 tsp of ground rosemary
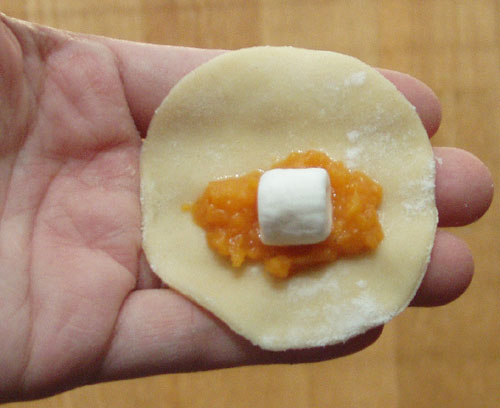 2-inch "Sweet Potato Pie" Pierogi 1. Combine all the ingredients for the filling (it‟s best to use one‟s hands to do that) put into the bowl, cover and set aside in the fridge until you have to use it.
2. Place 2 cups flour in a large bowl or on a work surface and make a well in the center. Break the egg into it, add the salt and a little lukewarm at a time (in my situation 1/2 cup was enough). Bring the dough together, kneading well and adding more flour or water as necessary. Cover the dough with a bowl or towel. You‟re aiming for soft dough. Let it rest 20 minutes.
3. On a floured work surface, roll the dough out thinly (1/8” or about 3 millimeters) cut with a 2-inch (5 cm) 4-inch round or glass. Spoon a portion (teaspoon will be the best) of the filling into the middle of each circle. Fold dough in half and pinch edges together. Gather scraps, re-roll and fill. Repeat with remaining dough.
4. Bring a large, low saucepan of salted water to boil. Drop in the pierogi, not too many, only single layer in the pan! Return to the boil and reduce heat. When the pierogi rise to the surface, continue to simmer a few minutes more ( usually about 5 minutes). Remove one dumpling with a slotted spoon and taste if ready. When satisfied, remove remaining pierogi from the water.
5. Serve immediately preferably with crème fraiche or fry. Cold pierogi can be fried. Boiled Russian pierogi can be easily frozen and boiled taken out straight from the freezer.
6. Fry in a pan with melted butter until golden brown on both sides, about 5 minutes… OR toast in a toaster oven 10 minutes or until puffy… OR bake at 350F for 10 minutes or until puffy.
I freeze mine on a cookie sheet before boiling them, and I just increase the cook time by 2 minutes if it’s frozen when I first put it in – no problem. I was really favoring the boiled-then-pan-fried method, until I thought I’d test out the toaster oven; boiling then tossing in the toaster oven makes a nice puffy, soft, slightly chewy pierogi and has less oil than the pan-fried. Every cook method I’ve tried has been incredibly tasty, so long as I boiled them first, before doing something else, and they taste fine just boiled, too.
I found that I liked the 4-inch circular cutter over the 2-inch cutter. The difference is a tablespoon of filling in a 4-inch or a teaspoon of filling in the smaller one. If you’re looking for bite-size, go with the 2-inch cutter; we prefer to make them finger-food rather than bite-size, and the 4-inch works for me. Cooking time is only increased by a minute or two, depending on how big the boiling pot is and how many pierogi are in the pot!
Other filling ideas:
meat and cabbage … soybeans … sauerkraut, mushrooms and carrots …
sweet potatoes and marshmallows … fruit …
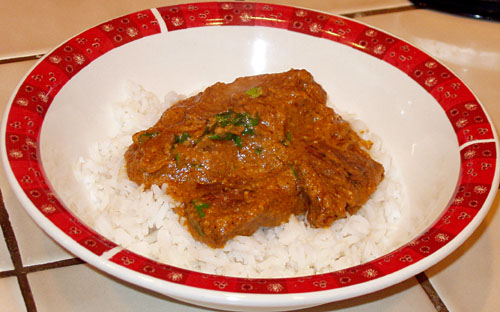 Beef with Curried Tomato Almond Sauce Total time: Approximately 1 hour.
The July 2010 Daring Cooks’ Challenge was hosted by Margie of More Please and Natashya of Living in the Kitchen with Puppies. They chose to challenge Daring Cooks to make their own nut butter from scratch, and use the nut butter in a savory recipe. The original recipe given called for chicken, I used beef, and I substituted heavy cream in place of milk.
1 Tablespoon (15 ml) olive oil
24 ounces beef, cubed or diced
Salt to taste
Spice Blend:
1.5 tablespoons (20 ml) garam masala seasoning
1 teaspoon (5 ml) ground ginger
1/2 teaspoon (2 ml) ground cinnamon
1/4 teaspoon (1 ml) black pepper
Sauce:
4 tablespoons (60 ml) butter
1 large onion, cut in half pole to pole
2 cloves garlic, minced
1 (15-ounce/425 g) can tomato sauce
1/3 cup (80 ml) almond butter
1/2 cup (80 ml) heavy cream
½ to ¾ cup (120 to 180 ml) chicken broth or water, more as needed
1 tsp cayenne pepper (optional)
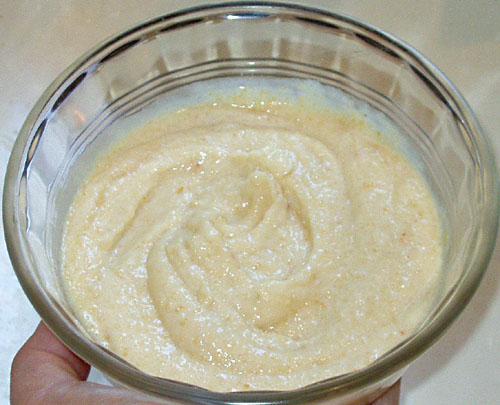 Almond Cream Directions:
Mix together almond butter and heavy cream in a food processor or blender (or whisk until smooth). Set aside.
Stir garam masala, ginger, cinnamon, and pepper together in a small bowl. Set aside.
If desired, pound meat to ¼ inch (6 mm) thickness to promote even cooking. Sprinkle with a bit of salt and pepper to taste. Heat 1 teaspoon (5 ml) olive oil a large nonstick skillet over medium-high heat. Add half the meat; sauté 3 to 5 minutes on each side or until cooked through. Cook the meat in 2 batches, adding more oil if needed for second batch. Set aside on clean plate and keep warm.
Melt the butter in large nonstick skillet over medium-low heat. Add the onion and cook gently for several minutes to infuse the butter with onion flavor. Keep the heat low to avoid burning the butter; a little color is fine. Add the spice blend and garlic and cook for 1 minute or till fragrant, stirring constantly. Add the tomato sauce, stir well, and bring to boil. Reduce heat to simmer. Whisk in almond cream until thoroughly combined with tomato sauce. Return to simmer. Add broth (or water) to sauce to reach desired consistency; return to simmer. Add more broth (or water) as needed to thin sauce as desired.
Transfer sliced meat to sauce. Simmer gently for a few minutes until meat is heated through.
Serve meat and sauce over rice. Garnish with chopped parsley and/or sliced almonds if desired.
As this is, I couldn’t possibly label it as Indian, but it definitely has an Indian flavor to it. So if you’re looking for something reminiscent of Indian food, and you’re not a fan of cumin or fenugreek, this is definitely a winner.
|
|


