|
|
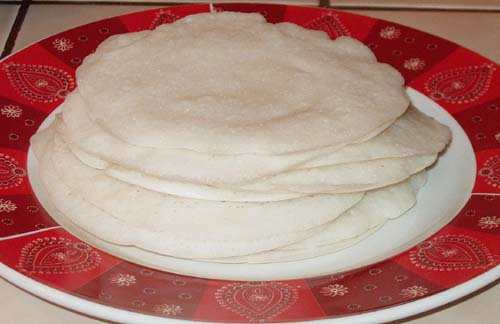 Appam, or hopper, is a rice pancake Mary, who writes the delicious blog, Mary Mary Culinary was our August Daring Cooks’ host. Mary chose to show us how delicious South Indian cuisine is! She challenged us to make Appam and another South Indian/Sri Lankan dish to go with the warm flat bread.
Total time: 12-16 hours.
Ingredients:
1 ½ cups (360 ml/300 gm/10½ oz) raw rice
1 ½ teaspoons (7½ ml/5 gm) active dry yeast
2 teaspoons (10 ml/9 gm) sugar
½ cup (120 ml) of coconut water or water, room temperature
1 ½ tablespoons (22½ ml/18 gm) cooked rice
½ teaspoon (2½ ml/3 gm) salt
about ½ cup (120 ml) thick coconut milk (from the top of an unshaken can)
Directions:
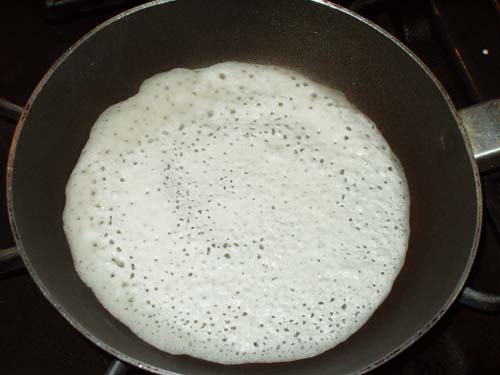 My edges weren't thin all the time, but it still worked out. 1. Soak the raw rice in 4 to 5 cups of water for 3 hours. I kept forgetting to do this, so I soaked overnight. Worked great. 😉
2. Dissolve the sugar in the coconut water or plain water and add the yeast. Set aside in a warm area for 10-15 minutes, until very frothy.
3. Drain the rice and grind it in a blender with the yeast mixture to make a smooth batter. You can add a bit of extra water if needed, but I did not. Add the cooked rice, and grind/blend to combine well.
4. Pour into a large bowl, cover and leave in a warm place for 8-12 hours. You not only want the mixture to rise and collapse, but to ferment. When it is ready, it will have a slightly sour and distinctly yeasty smell. Don’t worry–they are mild tasting when cooked!
5. Add the coconut milk and salt, and a bit of water if necessary, so that you have a batter that is just a bit thicker than milk. Notice how it bubbles after you add the coconut milk. I recommend test-cooking one before thinning the batter.
6. Heat your pan over medium heat. Wipe a few drops of oil over it using a paper towel. Stir the batter and pour in 3-4 tablespoons, depending on the size of the pan. Working quickly, hold the handle(s) and give the pan a quick swirl so that the batter comes to the top edge. Swirl once only, as you want the edges to be thin and lacy.
7. Cover the pan and cook for about 2 minutes. Uncover and check. The center should have puffed up a bit, and will be shiny, but dry to the touch. When ready, loosen the edges with a small spatula and serve immediately. These need to be served hot out of the pan.
The leftover batter can be refrigerated for a day or 2.
Wow. These are new and amazing to me, and I will be making them again and again. I enjoyed them so much, I was looking around for more.
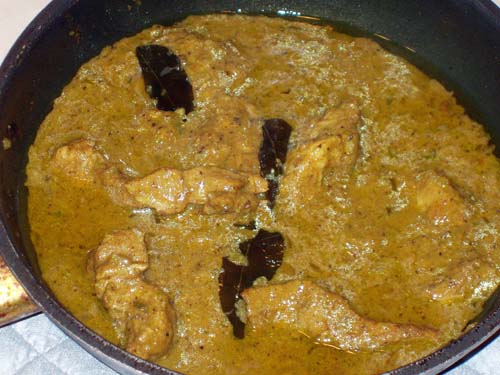 Sri Lankan Curry with pork Mary, who writes the delicious blog, Mary Mary Culinary was our August Daring Cooks’ host. Mary chose to show us how delicious South Indian cuisine is! She challenged us to make Appam and another South Indian/Sri Lankan dish to go with the warm flat bread.
Total time: 1.5 hours.
1 pound (½ kg) boneless meat, or about 1 ½ pounds (¾ kg) short ribs or cross ribs (or boneless lamb shoulder) I used pork!
1 tablespoon (15 ml) vegetable oil
10 fresh or frozen curry leaves
1-3 green cayenne chili, finely chopped
generous 1 cup (250ml/250 gm/9 oz) finely chopped onion
1 teaspoon (5 ml/3 gm) turmeric
1 teaspoon (5 ml/6 gm) salt
½ cup (120 ml) coconut milk
1 tablespoon (15 ml/15 gm) tamarind pulp
¼ cup (60 ml) hot water
1/4 cup tamarind paste
3 cups (720 ml) water
Dry Spice Mixture:
1 tablespoon (15 ml/13 gm) raw white rice
1 tablespoon (15 ml/10 gm) coriander seeds
1 teaspoon (5 ml/4 gm) cumin seeds
one 1-inch piece (2½ cm) cinnamon or cassia stick
seeds from 2 pods of green cardamom
Directions:
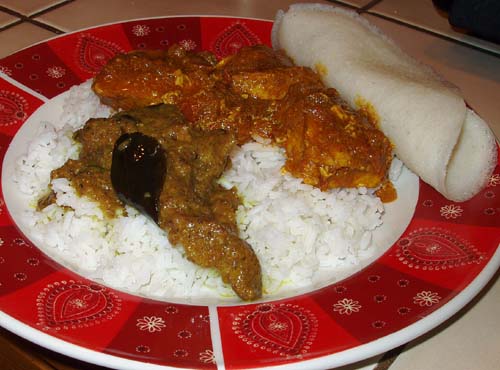 Sri Lankan Curry with pork and hot curried chicken, with rice and appam 1. Cut the meat into ½ inch (13 mm) cubes or separate the ribs. Set aside.
2. In a small heavy skillet, roast the dry spice mixture over medium to medium-high heat for 3 to 4 minutes, stirring continuously, until it smells amazing! You will be able to see that the rice is a toasted color.
3. Transfer to a spice grinder or mortar and grind/pound to a powder. Set aside.
4. In a large, wide pot, heat the oil over medium-high heat. Add the curry leaves, green chile, onion and turmeric and stir-fry for 3 minutes. I cooked my onions until they were golden brown. So good. Add the meat and salt and cook for 5 minutes, stirring occasionally so all surfaces of the meat get browned.
5. Add the reserved spice mixture and the coconut milk and stir to coat the meat. Reduce the heat to medium and cook for 10 minutes, stirring occasionally.
6. Add the tamarind paste to the 3 cups of water.
7. Add the tamarind/water mixture to the pot and bring to the boil. Reduce the heat and cook uncovered at a strong simmer for about an hour, until the meat is tender and the flavors are well blended. Taste and adjust the seasoning. Serve hot.
Shown here with hot curried chicken, rice, and an appam.
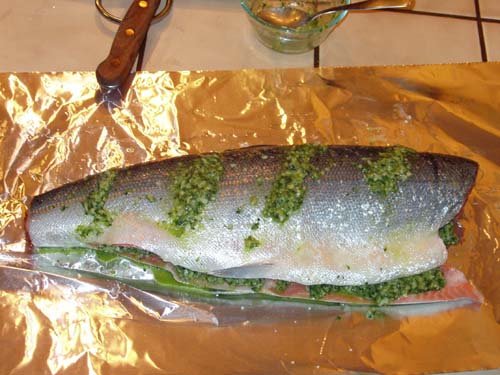 Raw Goan Fish, ready for foil and grilling Mary, who writes the delicious blog, Mary Mary Culinary was our August Daring Cooks’ host. Mary chose to show us how delicious South Indian cuisine is! She challenged us to make Appam and another South Indian/Sri Lankan dish to go with the warm flat bread.
One 2-pound (1 kg) firm fish, such as pickerel, trout or red snapper, cleaned and scaled – I used pink salmon
about ¼ cup (60 ml) vegetable oil
about 8 fresh curry leaves – I didn’t know where to use these, so I skipped it
2 tablespoons (30 ml) fresh lime juice
1 tablespoon (15 ml/18 gm) fine sea salt
½ cup (120 ml/110 gm) Fresh Green Chile Chutney, plus extra to serve as a condiment
Preheat your grill or start your charcoal.
Wash and dry the fish. Cut slits every three to four inches along each side of the fish. Grease a large stretch of foil 3 tablespoons (45 ml) of the oil.
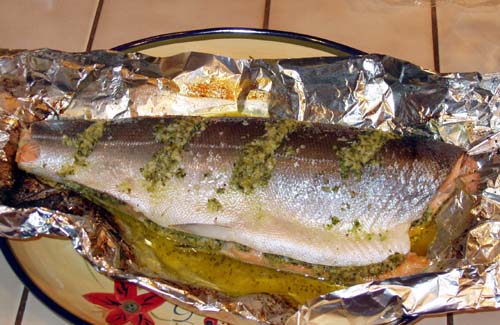 Goan Fish, fresh off the grill with lots of juice! Rub the fish inside and out with the lime juice, then with the salt. Stuff some of the chutney into the slits you made, and put the rest in the belly cavity. Place the fish on the oiled foil and rub the remaining oil over it. Wrap the fish tightly, using more foil if necessary.
Move your charcoal to one side of the grill or turn off the heat on one side of your grill. Place your foiled fish on the “off” side and close the lid. Grill 20-30 minutes, depending on the size of your fish (10 minutes per pound), keeping the heat at 400F or above. Depending on the size of your grill, you may need to rotate your fish halfway through.
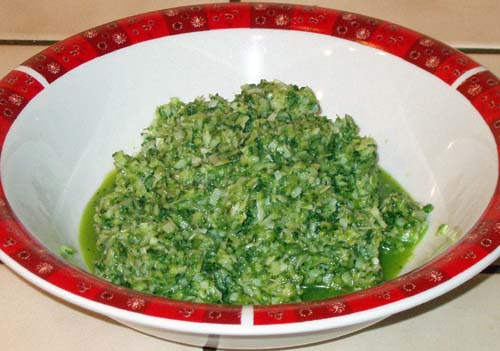 Fresh Green Chile Chutney Mary, who writes the delicious blog, Mary Mary Culinary was our August Daring Cooks’ host. Mary chose to show us how delicious South Indian cuisine is! She challenged us to make Appam and another South Indian/Sri Lankan dish to go with the warm flat bread.
Total time: 15 minutes.
Ingredients:
2 cups (480 ml/120 gm/4¼ oz) packed cilantro (coriander) leaves and stems
6 green cayenne chiles, coarsely chopped
6-10 medium garlic cloves, chopped
2 teaspoons (10 ml/6 gm) minced peeled ginger
about 1 cup (240 ml/80 gm/2¾ oz) fresh or frozen grated coconut
1 teaspoon (5 ml/3 gm) cumin seeds, coarsely ground
3 tablespoons (45 ml) fresh lime juice
1 teaspoon (5 ml/4½ gm) sugar
1 teaspoon (5 ml/6 gm) salt, or to taste
Directions:
1. In a food processor, combine the cilantro, chiles, garlic and ginger and process to a paste. Add the coconut and process until blended. Transfer to a bowl.
2. Add the cumin, lime juice, salt and sugar and mix well. Taste for seasoning (it will be hot!). Keeps for about 4 days refrigerated.
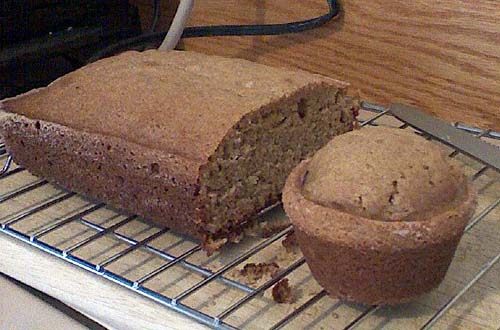 Friendship Bread and blueberry muffins Total time: 30-60 minutes, plus 7-10 days.
Friendship bread is that chain-letter-bread that you divide with your neighbors and continue to reap the benefits from over and over again. The concept is to take your starter, triple it, then share it with 2 people. You bake with your share, and they bake with their share in 10 days.
Starter:
3 tsp active dry yeast
1/4 cup warm water
1 cup all-purpose flour, sifted
1 cup white sugar
1 cup warm milk
In a large mixing bowl, dissolve yeast in warm water, 3-5 minutes. Add remaining ingredients and mix well. Scoop out 1 cup for each of your neighbors. Keep the remaining for yourself. Some people store them in ziplock bags, others in small plastic containers. Either way you do it, this needs to be 3 separate starters. Store in the refrigerator 7-10 days.
For the next 7-10 days, either squeeze and massage your starter in its bag or stir it gently with a spoon, daily.
Day of Baking:
Frugal Fanny Style:
your starter dough
1 cup flour
1 cup milk
1 cup sugar
In a large mixing bowl, combine your starter, flour, milk, and sugar. Mix well. Scoop out two cups for two more starters for yourself. Continue to Hungry Hippo Style.
OR skip this step and move straight on to
Hungry Hippo Style:
your starter dough
1 cup flour
1 egg
1/4 cup vegetable oil
1/4 cup sugar
1 tsp vanilla extract
3/4 tsp baking powder
1/2 tsp cinnamon
1/4 tsp baking soda
1/4 tsp salt
softened or melted butter
sugar for dusting
Preheat oven to 325F.
Grease a loaf pan or muffin tin with soft or melted butter. Dust with sugar.
In a large mixing bowl, combine your starter and all the other ingredients. Beat until well blended. If you want to fold in fruit or other bread or muffin add-ins, now is the time to fold them in. Pour batter into loaf pans or muffin cups.
Bake 22-25 minutes until dark golden brown.
Planning/Party Patsy Style:
Do Frugal Fanny Style except only scoop out one cup of new starter for yourself. Double the ingredients in Hungry Hippo Style and make two loaves of bread or a loaf of bread and 12 muffins (pictured). If you bake them side by side, increase bake time to 45-60 minutes.
Is Stacie Amish? Does Stacie have Amish friends? Is it just the bread that’s Amish? How about none of it. Or let’s say yes to all of it, just for fun. It’s all Amish. Bring on the farm.
“Cuppy,” you ask, “what happened to the nice even numbers of 1 scoop this, 1 scoop that?!” I strangely found the original recipe too sweet. Yes, I thought something was too sweet. I blame La Niña.
Do you need to share this starter? No. Do you need to share the bread or muffins? No.
As of this post, I’ve used the same batter 4 times, and I have one in the refrigerator.
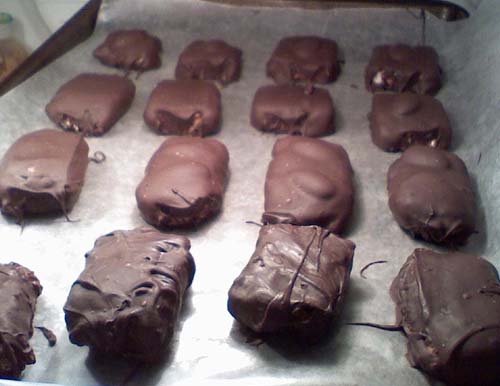 Chocolate covered coconut candies. Total time: 1 hour 15 minutes, plus chill time.
Sometimes you feel like a nut…
2/3 c sweetened condensed milk (little less than 1/2 of a 14 ounce can)
1 tsp vanilla
2 c powdered sugar
2 c shredded or flaked coconut
1 bag of your choice of meltable yummy chocolate
optional almonds
In a small food processor or blender, cut up the coconut into very fine pieces.
In a larger food processor or blender, combine milk, sugar and vanilla until smooth. Remove from unit and stir in coconut.
Press coconut mix into a 9×13 pan. Spread it all out and press down to make it about 1/4 inch thick. Refrigerate 45-60 minutes or until firm.
Cut firmed coconut mix into small squares or circles or whatever it is you’re looking to slather in chocolate. Press almonds into the tops if you so feel like it.
Slather in chocolate. Chill on wax paper in the refrigerator.
You know what these are… I can’t say their names. And I can’t give you an accurate count because I always eat a bunch of the coconut before it ever makes it to the chocolate.
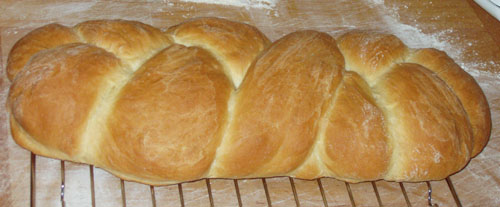 Braided egg bread Total time: Approximately 3 hours.
Adapted from the Joy of Cooking.
1 Tbsp active dry yeast
1 c warm water + 2 Tbsp warm water
4 tsp sugar + 1/2 tsp sugar
3 c all purpose flour
1 1/2 tsp salt
1 egg, slightly beaten
2 Tbsp vegetable oil
pinch of saffron
In a small bowl, combine yeast, 1/2 tsp sugar and 2 Tbsp warm water. Set aside 3-5 minutes.
In a large mixing bowl, combine flour and salt. Make a deep well in the middle of the flour. Pour in yeast mixture, egg, oil and saffron. Combine and beat well until all the flour appears incorporated and a ball of dough forms. Set aside 10 minutes.
Turn out dough onto a well-floured surface and knead 6-10 minutes until smooth and pliable. Shape into a ball and place dough into a large, lightly greased bowl. Cover with a towel or saran wrap and let rise until doubled in bulk (about an hour).
Punch down (do it!) and turn dough onto a lightly floured surface. Divide into three pieces and roll each piece to form a tapered cylinder about two feet long. Braid them together and tuck in the ends. Place braided dough onto a lightly greased or lightly floured cookie sheet to rise (about an hour).
Bake in a preheated oven at 400F for 9 minutes. Turn the pan around and turn the heat down to 375F. Bake at 375F for 20 minutes or until darkly golden.
Some people like to brush their breads with egg to make them look pretty or develop a certain sort of crust. Eh… I guess it depends on if you’re trying to impress someone. We normally eat it so fast it doesn’t matter.
I like to put a brownie pan filled with water on the bottom rack of the oven when I bake this bread. Keeping the humidity up in your oven will help your bread to cook more evenly and keep the temperature in the oven from fluctuating too much. So I hear.
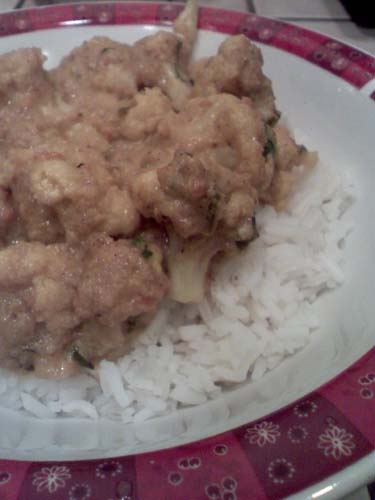 Cauliflower Curry on rice Total time: Approximately 1.5 hours.
Adapted from 1,000 Indian Recipes by Neelam Batra.
1 large cauliflower, washed
3 Tbsp vegetable oil
~1 tsp salt
1 medium onion, coarsely chopped
8 quarter-size slices fresh, peeled ginger
2 tsp minced garlic
1 to 3 serrano peppers
2 large tomatoes, coarsely chopped
1/2 c plain yogurt, whisked until smooth
1 c water
1/4 tsp ground nutmeg
1 1/2 tsp ground coriander
1 tsp ground cumin
1/2 tsp garam masala + 1/4 tsp for garnish
1/4 tsp ground turmeric
1/2 c finely chopped fresh cilantro
Peel away the leaves at the stem of the cauliflower. Wash the head of cauliflower and trim away any brown spots by scraping them off with your knife. Turn the cauliflower on its head and cut from the stalk to the florets in one big slice, creating two halves.
Remove the fibrous outer coating of the stalk, but keep the softer insides. In a food processor or blender, combine the soft stalk pieces, onion, ginger, garlic and serranos until mostly smooth. Set aside.
Puree tomatoes, set aside.
Chop remaining cauliflower into bite size florets. In a small, microwave safe container, toss florets with 1 Tbsp of oil and sprinkle lightly with 1/4 tsp of salt. Microwave on high 3 minutes. Transfer to a large frying pan or wok and cook over medium-low heat until pieces are mostly brown on all sides. Remove florets to a bowl, but keep the heat on.
Add remaining 2 Tbsp of oil to the pan. Add onion mix and cook over medium-high heat until mostly brown, stirring occasionally. Add tomatoes and cook 8-10 minutes, until most of the juice is absorbed and a nice oily sheen appears. Add seasonings and cook 1-2 minutes more.
Reduce heat to low. Slowly add water and yogurt, stirring constantly until well incorporated. Turn heat back up to medium, add cauliflower back into the pan, mix well and cover. Let simmer 20-30 minutes until cauliflower is tender.
Add cilantro and remaining garam masala just before serving.
In case you hadn’t guessed, cauliflower = dinosaur bones. I challenge you to come up with a more clever way to get a toddler to eat cauliflower.
I liked this a lot, but we decided it was just a lot of cauliflower for a main course. So I’ve relegated this to a side dish, and I probably won’t make it again unless I know I have company that’s either 1. mostly vegetarian and/or 2. loves cauliflower.
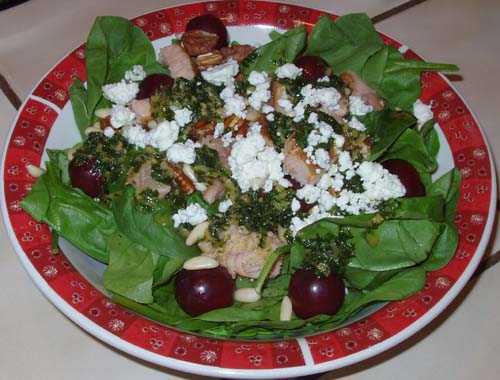 Spinach, salmon, feta, nuts and grapes with a spicy orange cilantro dressing. Total time: 10 minutes.
Serves 2.
Salad:
1 bunch spinach or 1 package of baby spinach
1 cup smoked salmon, deboned and separated
1 cup red grapes
1 cup feta cheese
1/2 c pecan pieces
1/2 c pine nuts
Dressing:
3 T olive oil, divided
1/4 c minced ginger
1/3 c orange juice
1/3 c red wine vinegar
1/4 tsp orange zest
1/2 c loose chopped cilantro
2 T brown sugar
Heat 1 tablespoon of oil in a small saucepan on medium heat for 1 minute. Add ginger and cook until golden brown, about 4 minutes. Add orange juice and brown sugar and bring to a boil. Continue to boil for 3-4 minutes until the orange juice feels reduced and slightly thicker. Remove from heat. Add orange zest. Puree together with remaining dressing ingredients.
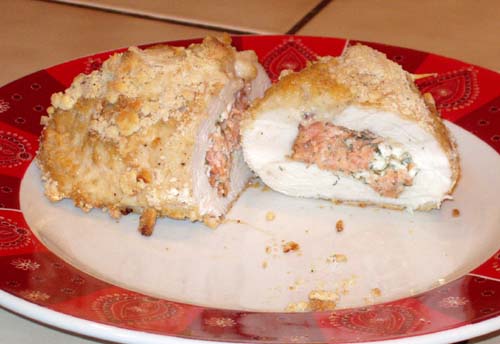 Salmon Stuffed Chicken Breast Total time: 1 hour.
2 boneless chicken breasts
3/4 c smoked salmon, separated and deboned
3/4 c feta cheese
2 tsp minced garlic
1 tsp dill weed
1/2 tsp salt or to taste
breadcrumbs
Serves 2.
Preheat oven to 400F.
In a small bowl, mix together feta, salmon, garlic, dill and salt.
Using a sharp knife, slice open each chicken breast horizontally, almost all the way through, leaving the two halves attached. Open up the split breasts and lay them out flat. Place each piece of chicken, laid out flat, in a plastic bag or plastic wrap one at a time. Pound the chicken pieces to ¼-inch thickness.
Scoop filling into the chicken breasts and seal them with 3 or 4 toothpicks. (Make sure you remember how many you use.) Roll filled breast in breadcrumbs. Repeat for the second one.
Bake 45 minutes. Let cool 5 minutes before trying to remove those toothpicks.
I use a glass baking dish whenever I bake meat. If you don’t have one, you’ll need to keep better watch on your chicken.
|
|


