|
|
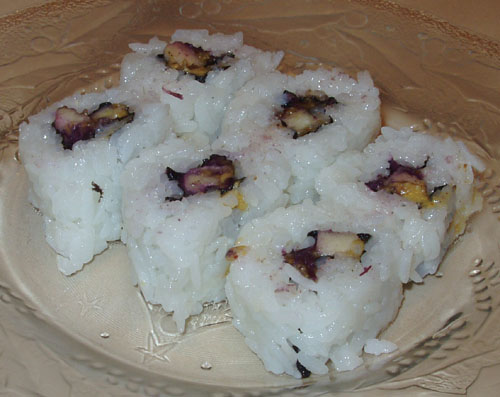 Peanut butter, spicy grape compote, and apple slices The November 2009 Daring Cooks challenge was brought to us by Audax of Audax Artifex and Rose of The Bite Me Kitchen.
Preparation time: 1¾ hours consisting of :-
Rinsing and draining rice: 35 minutes
Soaking rice: 30 minutes (includes 5 minutes making the vinegar dressing)
Cooking and steaming time: 25 minutes
Finishing the rice: 15 minutes
INGREDIENTS:
- 3 cups uncooked short grain rice
- 3 cups water
- For superior results use equal volumes of rice and water
Sushi vinegar dressing
- 6 Tablespoons (75 mls) rice vinegar
- 3 Tablespoons (25 mls or 21 grams) sugar
- 1 ½ Teaspoons (6.25 mls or 4.5 grams) salt
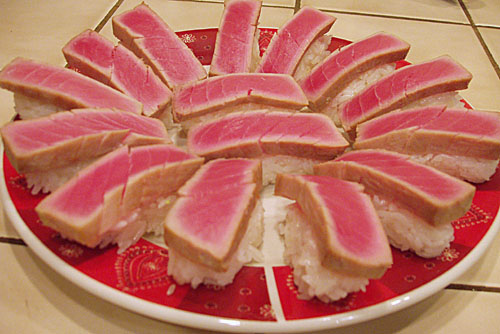 Maguro Nigiri (browned tuna nigiri style) DIRECTIONS:
Rinsing and draining the rice
- Swirl rice gently in a bowl of water, drain, repeat 3-4 times until water is nearly clear. Don’t crush the rice in your hands or against the side of the bowl since dry rice is very brittle.
- Gently place rice into a strainer and drain well for 30 minutes.
Soaking the rice
- Gently place the rice into a heavy medium pot with a tight fitting lid (if you have a loose fitting lid use a piece of aluminium foil to make the seal tight).
- Add 3 cups of water.
- Set the rice aside to soak for 30 minutes, during this time prepare the sushi rice dressing.
Preparing the Rice Vinegar Dressing
- Combine the rice vinegar, sugar and salt in a small bowl.
- Heat on low setting.
- Stir until the mixture goes clear and the sugar and salt have dissolved.
- Set aside at room temperature until the rice is cooked.
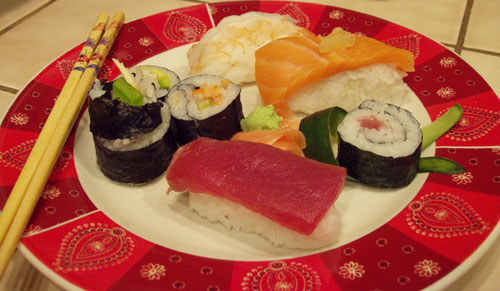 From the chopsticks, clockwise: California rolls, Seattle rolls, ebi nigiri, sake nigiri, tuna roll, maguro nigiri Cooking the rice
- After 30 minutes of soaking, bring rinsed and soaked rice to a boil.
- Reduce heat to the lowest setting and simmer, covered, until all the water is absorbed, 12-15 minutes. Do not remove the lid during this process. Turn off heat.
- Let stand with the lid on, 10-15 minutes. Do not peek inside the pot or remove the lid. During this time the rice is steaming which completes the cooking process.
Finishing the rice
- Moisten lightly a flat thin wooden spatula or spoon and a large shallow flat-bottomed non-metallic (plastic, glass or wood) bowl. Do not use metallic objects since the vinegar will react with it and produce sour and bitter sushi rice.
- Remove the dashi konbu (kelp) from the cooked rice.
- Use the spatula to loosen gently the rice and invert the rice pot over the bowl, gently causing the cooked rice to fall into the bowl in one central heap. Do this gently so as not to cause the rice grains to become damaged.
- Dressing the rice with vinegar
- Slowly pour the cooled sushi vinegar over the spatula onto the hot rice.
- Using the spatula gently spread the rice into a thin, even layer using a 45° cutting action to break up any lumps and to separate the rice. Don’t stir or mash rice.
- After the rice is spread out, start turning it over gently, in small portions, using a cutting action, allowing steam to escape, for about a minute.
- Fanning & Tossing the rice
- Continue turning over the rice, but now start fanning (using a piece of stiff cardboard) the rice vigorously as you do so. Don’t flip the rice into the air but continue to gently slice, lift and turn the rice occasionally, for 10 minutes. Cooling the rice using a fan gives good flavour, texture and a high-gloss sheen to the rice. The vinegar dressing will be absorbed by the hot rice. Using a small electric fan on the lowest speed setting is highly recommended.
- Stop fanning when there’s no more visible steam, and all the vinegar dressing has been adsorbed and the rice is shiny. Your sushi rice is ready to be used.
Cover with a damp, lint free cloth to prevent the rice from drying out while preparing your sushi meal. Do not store sushi rice in the refrigerator leave on the counter covered at room temperature. Sushi rice is best used when it is at room temperature.
* Tip: While the rice is draining, soaking and cooking prepare your rice vinegar dressing, sushi fillings and toppings.
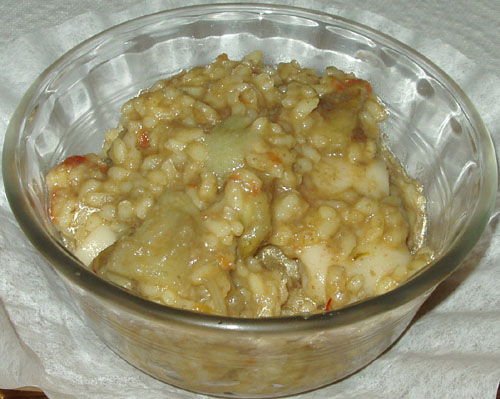 Creamy Rice with Artichokes, Mushrooms & Pasta Spools Total time: 1 hour, plus sofrito and aioli time.
Adapted from Creamy rice with mushrooms, cuttlefish and artichokes by José Andrés, this recipe contains no fish or meat. Daring Cooks’ August challenge.
* 1 cuttlefish or substitute
* 2 Artichokes
* 6 Mushrooms
* 1 Bay leaf
* 1/4 c of white wine
* “Sofregit”
* 1 cup short grain rice (Spanish types Calasparra or Montsant are preferred, but you can choose any other short grain)
* Water or Stock (use 1 ½ cup of liquid per ½ cup of rice)
* 3-4 saffron threads (or ground turmeric)
* Allioli (optional)
If using vegan pasta, skip steps 1 & 2. Prepare your pasta according to directions, and add to the dish near the end.
1. Cut the cuttlefish in little strips.
2. Add 1 or 2 tablespoon of olive oil in a frying pan and put the cuttlefish in the pan.
3. If you use fresh artichokes, clean and cut into eighths.
4. Clean the mushrooms and cut them into fourths.
5. Add a bay leaf, the artichokes and the mushrooms to the cuttlefish.
6. Sauté until we get a golden color in the artichokes.
7. Put a touch of white wine so all the solids in the bottom of the pan get mixed, getting a more flavorful dish.
8. Add a couple spoonfuls/scoops of sofregit and mix to make sure everything gets impregnated with the sofregit (I’ve used anywhere from 1/4 c to 2 c).
9. Add all the liquid and bring it to boil.
10. Add all the rice. Let boil for about 5 minutes in heavy heat.
11. Add some saffron thread to enrich the dish with its flavor and color. Stir a little bit so the rice and the other ingredients get the entire flavor. If you’re using turmeric or yellow coloring, use only 1/4 teaspoon.
12. Turn to low heat and boil for another 8 minutes (or until rice is a little softer than “al dente”)
13. Put the pan away from heat and let the rice stand a couple of minutes.
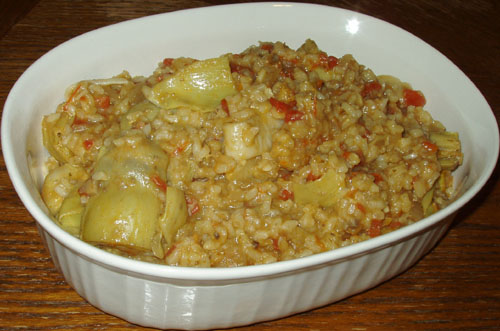 Creamy rice with mushrooms, artichokes & pasta spools; this time, with more sofregit! The first picture:
1. Vegan pasta loops shaped to look just like cuttlefish.
2. I cooked and ate my artichoke leaves and used the stock in place of fish stock.
3. I blended up my mushrooms in my food processor before adding them to the skillet (hence the excessive brown hue).
4. I’ve never owned white wine, and I found a “substitute” recipe that included lemon, vinegar and water.
5. I followed the instructions as best I could, and I used 1/3 cup of my sofrito because it tasted so awesome.
The second picture:
Steps 1-4 same.
5. I used 2 cups sofrito, and then I stirred in 1/4 cup of aioli.
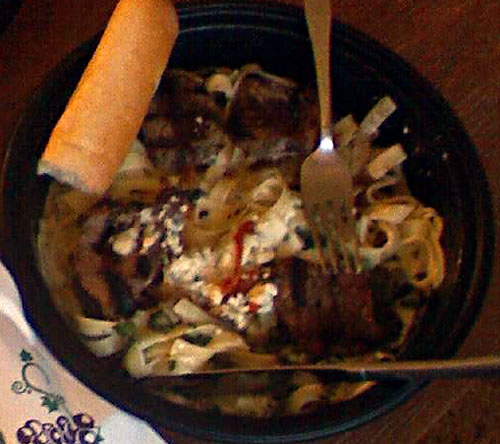 Olive Garden® Steak Gorgonzola-Alfredo Total time: 45 minutes, plus pasta cook time.
No longer on the menu at Olive Garden® is my absolute favorite entree from this restaurant. Lucky for all of us, Olive Garden® has always been happy to share their recipes for everything. This was pulled from their website before the menu item was removed!
Menu Description: Grilled beef medallions drizzled with balsamic glaze, served over fettuccine tossed with spinach and gorgonzola-alfredo sauce.
Serves 4
Cook time 10 minutes (depending on doneness of steak)
Prep time 30 minutes
Ingredients
2.5 pounds marinated steak (recipe follows)
1 pound uncooked pasta
16 fl oz spinach gorgonzola sauce (recipe follows)
2 tablespoons gorgonzola cheese
2 tablespoons chopped sun dried tomatoes
2 tablespoons balsamic glaze (recipe follows)
1. Grill steak to preferred doneness.
2. Cook 1 pound pasta according to the directions.
3. Place drained pasta in saute pan with heated sauce.
4. Toss pasta with sauce and place on a large platter.
5. Place grilled beef on pasta and sauce.
6. Drizzle with balsamic glaze, and sprinkle gorgonzola cheese and sun dried tomatoes.
Steak marinade
1.5 cups Italian dressing
1 tablespoon chopped fresh rosemary
1 tablespoon fresh lemon juice
1. Cut beef into 1 inch cubes and set aside
2. Mix the dressing, rosemary and lemon juice together
3. Add the marinade to the beef, toss, and let marinate for at least 1 hour.
Spinach Gorgonzola Sauce
16 fl oz Alfredo sauce*
4 cups chopped spinach
½ cup chopped green onion
3 tablespoons gorgonzola cheese crumbled
1. Heat Alfredo sauce in a large saute pan.
2. Add onion, spinach and gorgonzola cheese.
Olive Garden® Alfredo Sauce
1 1/2 cup(s) White Milk
1 1/2 cup(s) Heavy Cream
1/2 cup(s) Imported Parmesan Cheese, grated
1/2 cup(s) Imported Romano Cheese, grated
6 Egg yolks, fresh jumbo eggs
Salt and black pepper
BALSAMIC GLAZE #1
1/2 cup balsamic vinegar
1/2 cup water
2 Tablespoons brown sugar
Simmer until thickened, cool to room temperature.
BALSAMIC GLAZE #2
1/2 cup balsamic vinegar
2 tablespoons honey
3 tablespoons olive oil
2 garlic cloves, minced
Mix together ingredients in saucepan and bring to a boil. Simmer until mixture thickens slightly and becomes syrupy, whisking often, about 15 minutes.
Pick your glaze or make a combination of both. We skipped this altogether when we made it the first time. We also used our own alfredo sauce.
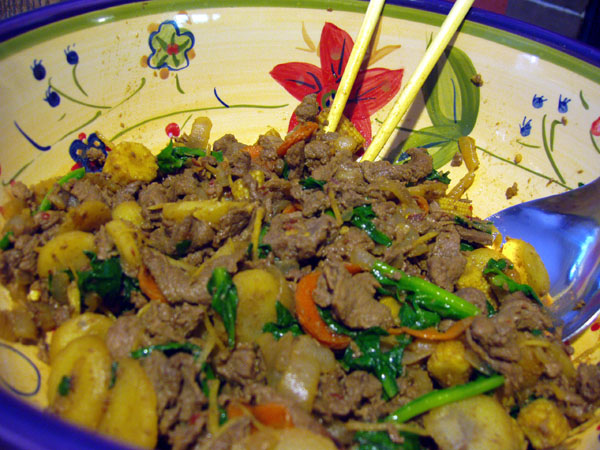 Beef Stir Fry with Vegetables Total time: 25 minutes, plus rice or pasta cook time.
Citrus, soy and spice are everything nice. This works well as a marinade or sauce, grilled or stir fried or any way you like.
3 Tbsp peanut oil
3 Tbsp orange juice
3 Tbsp lime juice
2 Tbsp soy sauce
2 Tbsp spicy vinegar
1 Tbsp ginger root, minced or grated
1 Tbsp brown sugar
1 Tbsp sambal oelek
1 clove of garlic, minced
optional ingredients:
1 pound meat, your choice, finely sliced
1 medium onion, finely sliced
1 carrot, sliced
1 can baby corn
1 cup broccoli florets and/or pieces
1 can water chestnuts
1 bell pepper, chopped
Heat a large frying pan or wok on medium-high to high heat. Add peanut oil, swirl. Stir fry your onions for 3 minutes, then add meat, garlic, ginger, and lime juice. Continue to stir fry until meat is desired doneness (3-7 minutes). Add remaining ingredients and stir fry for 3 more minutes or until vegetables reach desired doneness.
Serve with rice or noodles!
Shown here with carrots, sliced water chestnuts, baby corn, and spinach.
I like to marinade my meat and onions in the sauce for 4-6 hours before cooking. I use the above method only if I don’t have time to set a marinade.
Total time: Approximately 25 minutes.
1/2 pound ground beef (optional)
4 cups cooked rice
2 cups broccoli florets and/or parts
1 can condensed cream of mushroom soup
1 cup of milk
1 1/2 cups shredded or 1 cup coarsely chopped cheese
2 Tbsp finely chopped onion
2 tsp minced garlic (or 1/2 tsp garlic powder)
salt and pepper to taste
Ritz crackers (optional)
Brown hamburger, garlic, and onions in a large skillet on medium heat. Add soup and milk, stirring constantly. Add cheese and stir until melted. Add broccoli and cook on medium 3-5 minutes or until soup begins to boil. Add rice and stir stir stir.
Top with crushed Ritz crackers and cheese before serving.
This filled up my frying pan and served three. Hooray for one-dish meals! Try it with any meat or no meat at all. Try it with any vegetable or no vegetables at all.
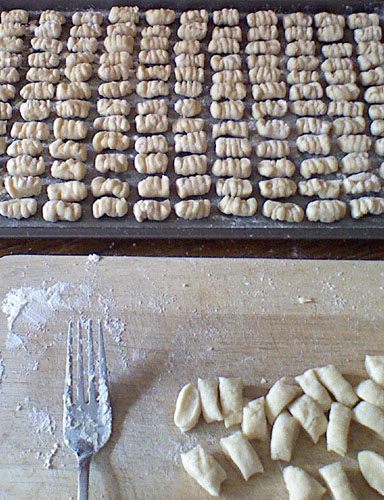 Army of Gnocchi Total time: Plan for 4 hours your first time. Once you’ve figured it out, it should only take you an hour next time.
Perhaps one of the most complex and frustrating things I’ve ever made. It doesn’t look that way, but it felt that way, for the three hours I stood there slicing gnocchi. We ate it in 10 minutes.
* 2 large potatoes or 3 medium potatoes
* approximately 2 cups all-purpose flour
* 1 egg
* 1 teaspoon of garlic or other seasonings (optional)
Boil the potatoes WHOLE until you can slide a fork into the middle of one without too much force (takes me about 30 minutes for 3 medium potatoes). Drain and cool (about an hour).
Peel off potato skins, discard. Mash and mash and mash the potatoes in a large bowl. If potatoes seem wet, try microwaving them for 3-5 minutes and let them cool for the same amount of time.
In a medium bowl, mix ONE CUP of mashed potatoes with an egg and 1 cup of flour. Knead dough and continue to add up to one more cup of flour until dough feels dry to the touch (but not so dry it crumbles). Do not add more than 2 cups of flour per 1 cup of potato!
Shape small portions of the dough into long “snakes”. On a floured surface, cut snakes into half-inch pieces.
Bring a large pot of lightly salted water to a boil. Drop in gnocchi and cook for 3 to 5 minutes or until gnocchi have risen to the top; drain and serve.
Some people like to roll the gnocchi pieces down their fork to create cute little ridges. Others just slice them right into the pot. I like to do the ridge test to see if I have enough flour (if the ridges stay up, perfect, if they flatten out, not so perfect). Honestly, at that point, it really depends on how tired or frustrated you are. 😉
I made half the first night with marinara sauce. I placed the remaining gnocchi on a waxed paper cookie sheet in the freezer. Once frozen, I slid them into a ziplock baggy and saved them for another night. The frozen ones took 5-7 minutes to cook and rise to the top.
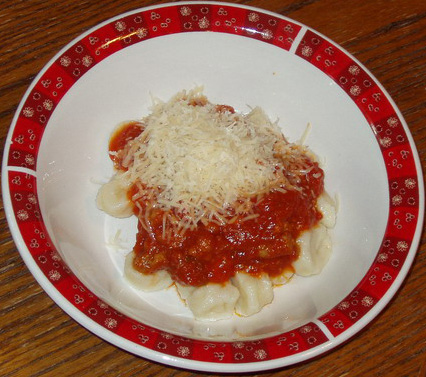 Gnocchi with spaghetti sauce. 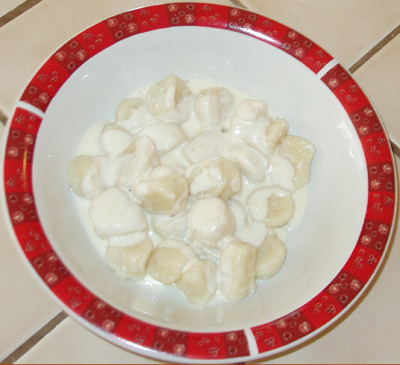 Gnocchi with alfredo sauce.
Total time: 25 minutes.
Not really a risotto, but you’ll see. This is a simple vegetarian style dish, that in this case is cooked in an electric rice steamer.
two cups of Thai style jasmine rice
one tablespoon of sliced garlic
one tablespoon of ground ginger
one tablespoon of chopped shallots (purple onions)
one table spoon of red prik ki nu (birdseye or dynamite chilis) sliced
one table spoon of green prik ki nu, sliced
A quantity of good chicken stock, equal to the volume of water specified by the rice cooker to cook two cups of rice, plus two tablespoons. (I normally use a normal sized can of chicken broth and 1 cup of water.)
Place the rice in the cooker.
Stir fry the other ingredients (except the stock)
Add all the ingredients to the cooker, and switch on.
When the cooking time is finished the dish is ready to serve.
(if you wish you can add a pinch of saffron or turmeric to colour the
rice yellow.)
Special thanks to – Muoi Khuntilanont.
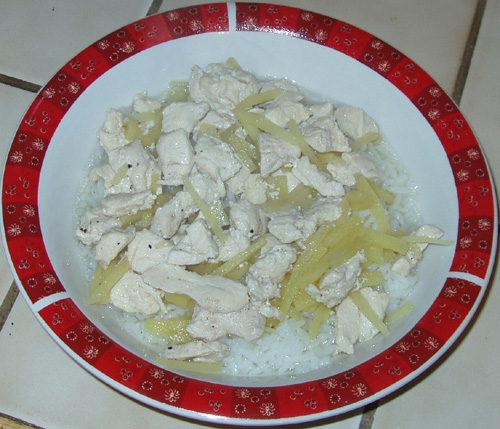 Not my mom's chicken and ginger, but it makes me happy. Total time: Approximately 35 minutes.
We eat a lot of spicy foods in my house, and one of my favorite quick meals is Thai chicken and & ginger (I’m half Thai). I tend to omit the fish sauce in favor of just adding more salt when I add the water to the skillet. My mom prefers chicken thighs and dark meat over breasts because it adds more fat to the dish. I’ve found it tastes the same either way… I even did it with leftover turkey this year. An alternative is to use carrots and ginger powder instead of ginger root.
2-3 boneless skinless chicken breasts, diced
1 chunk of ginger root the size of a child’s fist, peeled
Thai fish sauce (optional!)
1/4 teaspoon of salt (or less)
1/4 teaspoon of pepper (or more)
1 tbsp of vegetable or olive oil
4 cups of cooked rice
I have a rice cooker, so I typically get 2 cups of rice started and then begin cooking. I peel my ginger with a cheap steak knife because the serrated edges are perfect for getting right under the skin.
1. Cut the ginger julienne style. Place in a small bowl. Sprinkle 1/4 teaspoon of salt evenly across the top. The more salt you put in now, the hotter your ginger will taste. Too much salt will of course make it salty. 🙂
2. In a deep skillet, heat your tablespoon of oil on Medium and add the chicken. Cook the chicken until it just turns white, then cover for 2-3 minutes (just enough for the condensation to form and start to roll down the lid).
3. Squeeze the salted ginger with your hand until you can’t feel anymore grains of salt. You should see juice at the bottom of the bowl. Add ginger and juice to the skillet, but keep the bowl.
4. Pour three bowls full of water into the skillet. Add pepper and cover for 5-10 minutes (it should be boiling really well by then). Simmer until rice is done.
|
|


